Elegant Blue & Yellow Dessert Buffet + Photo Booth For A Wedding at Temple Emanu-el, San Jose7/30/2015  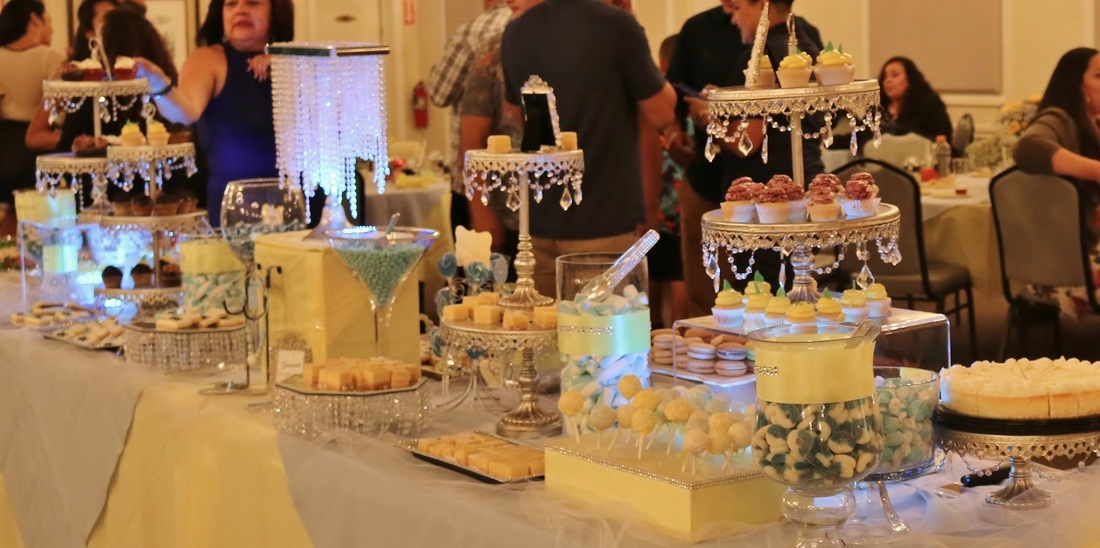 We had a wonderful time planning the dessert buffet table for Chad and Jason's wedding last July 25th. They asked for a classic and an elegant dessert table with the color theme of blue and yellow. The table offered both baked treats, and candies to give their guests a good variety to choose from. The dessert-filled, 12-foot long table was set-up in the center of the room so that guests could access the tempting treats from both sides of the table. Detail Highlights: -We used our antique silver tiered stands to complement the yellow and blue hues. -The candies and the light blue LED lights gave the table the splash of blue. While the linens, the labels, and ribbons were all yellow. -We hand-crafted items for this table: 1) The crystal-beaded, mirrored cake stands, and serving trays (We made 3 cake stands and 2 servers). Except for the stand that carried the cake, all the edges were embellished with rhinestones. 2) The waterfall-inspired Chandelier centerpiece seen below 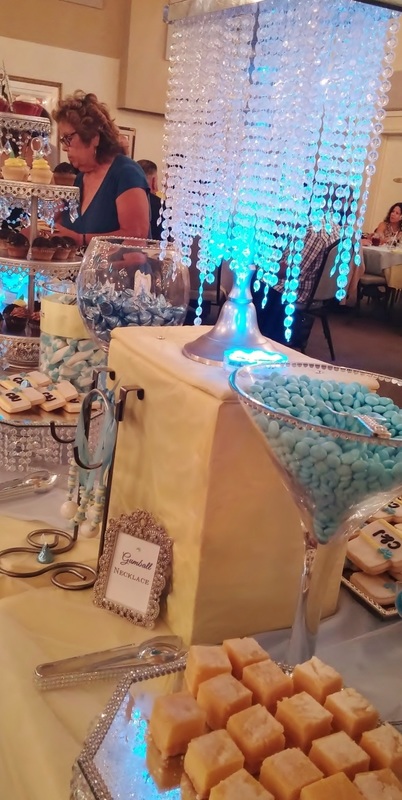 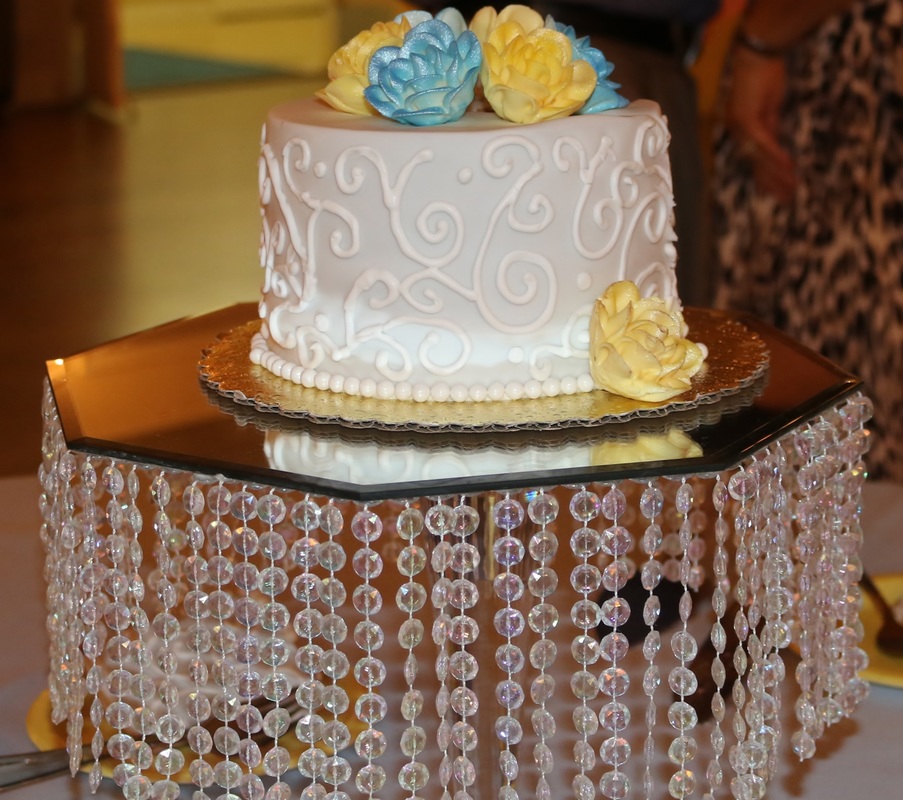 3 ) The rhinestone-framed yellow labels and personalized labels, in addition to the antique-silver framed dessert labels 4) And as usual for each dessert table we work on, all glass jars are accessorized with ribbons to match the event's color theme, and decked with rhinestones. See some of the photos below: 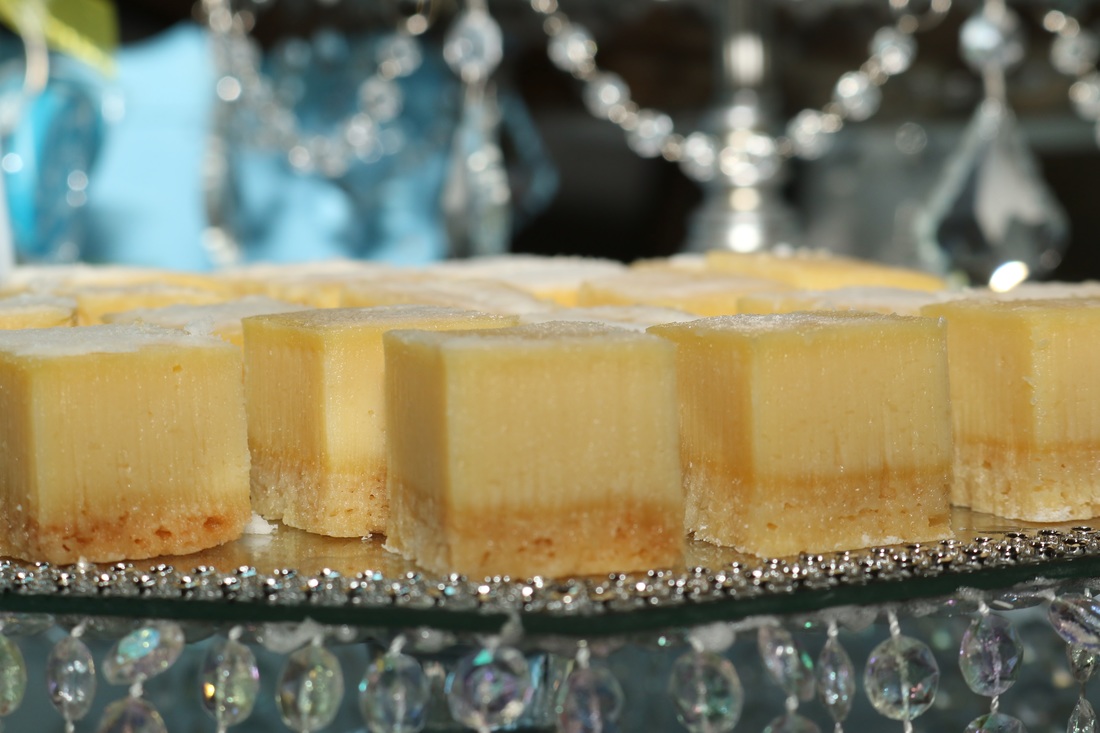 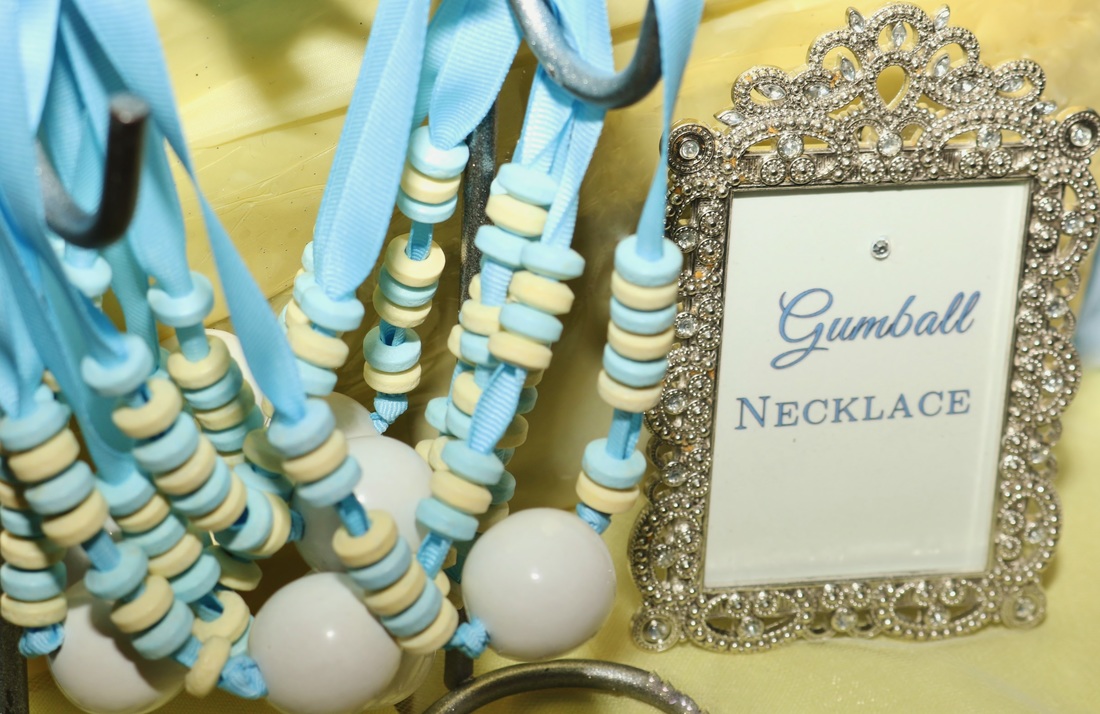 The photos above and below show the different sides of the table 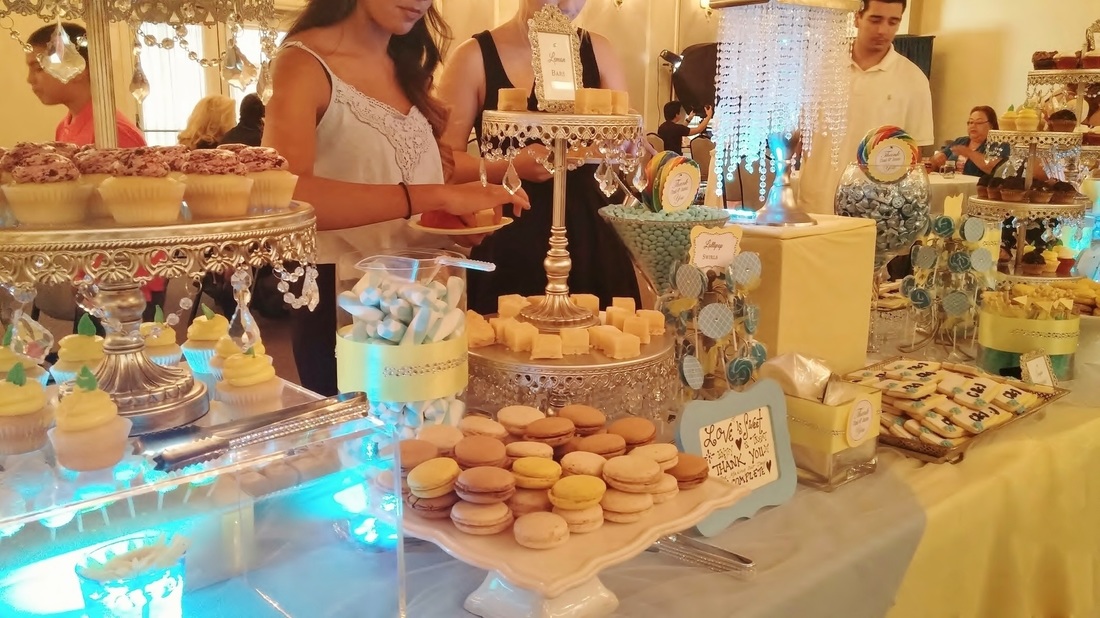 Guests enjoying the buffet table...  Some of the desserts in the Menu: 1) Cupcakes- lemon, lemon berry, red velvet, cookies & cream, and double chocolate 2) French Macarons- lemon, coffee, salted caramel 3) Cake Pops 4) Sugar cookies shaped in a wedding cake with the couple's monograms 5) Cheesecake brought by one of the guests 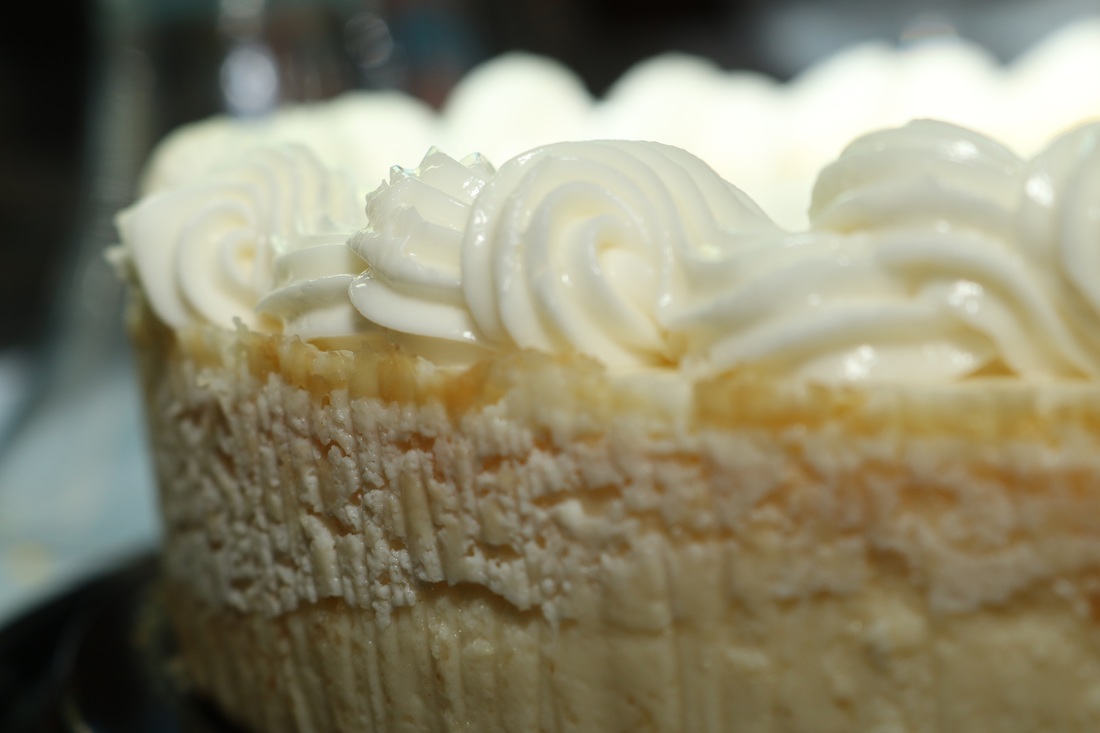 The grooms cutting their 6" cake below. A separate 8" cake with the same design was served to the guests.  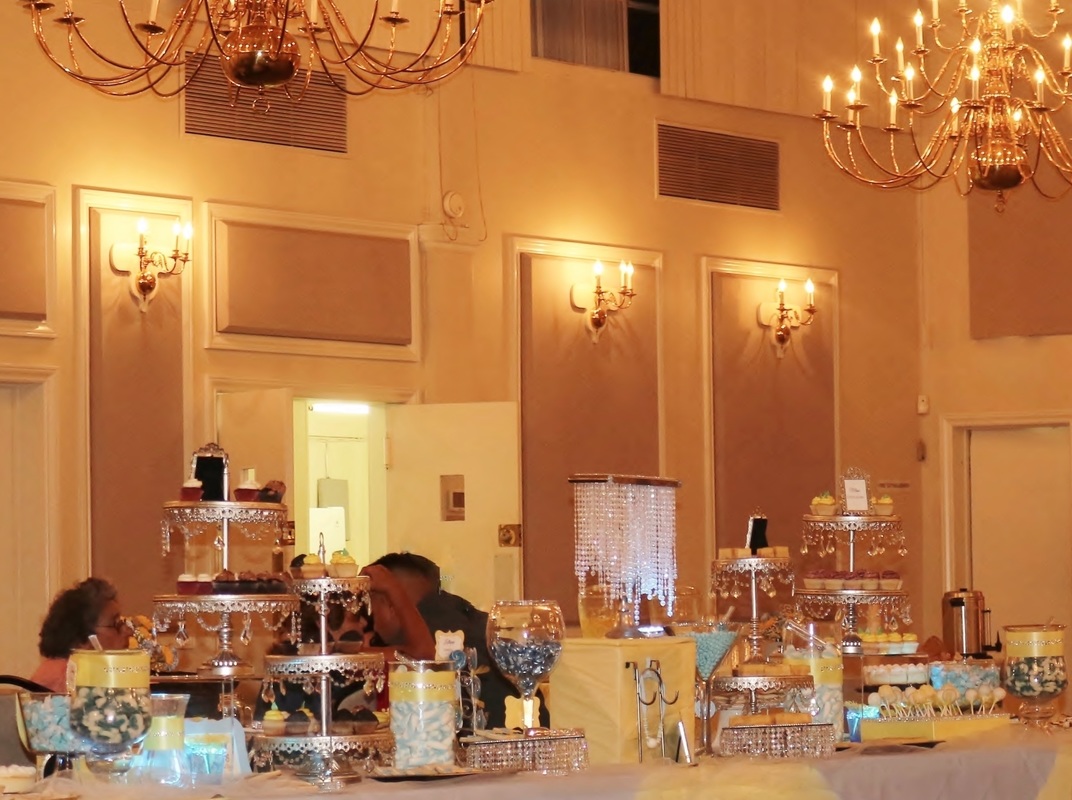 Credits: *6" & 8" Wedding Cake and Monogrammed, Wedding Cake-Shaped Sugar Cookies by Sweet Treat SJ *Cupcakes and French Macarons by Sweet Dreams Bakery Photo Booth Besides the dessert buffet table, we also set-up the booth/shoot for the reception party so guests went home with bags of sweet treats, plus their photo prints from the booth as their wedding souvenir. Below is a glimpse of the activity at the booth: Guests lining up at the Photo booth can be seen in the background 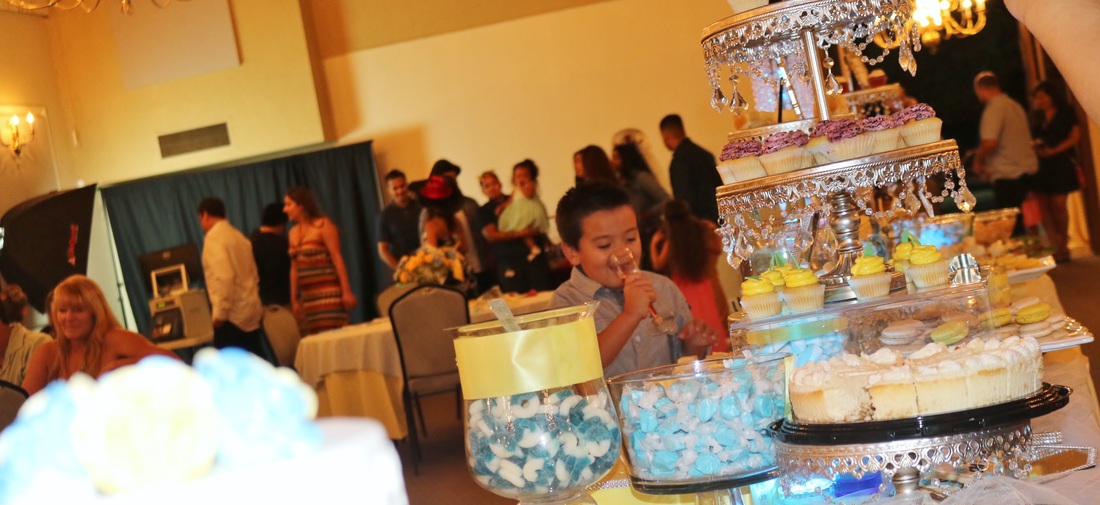 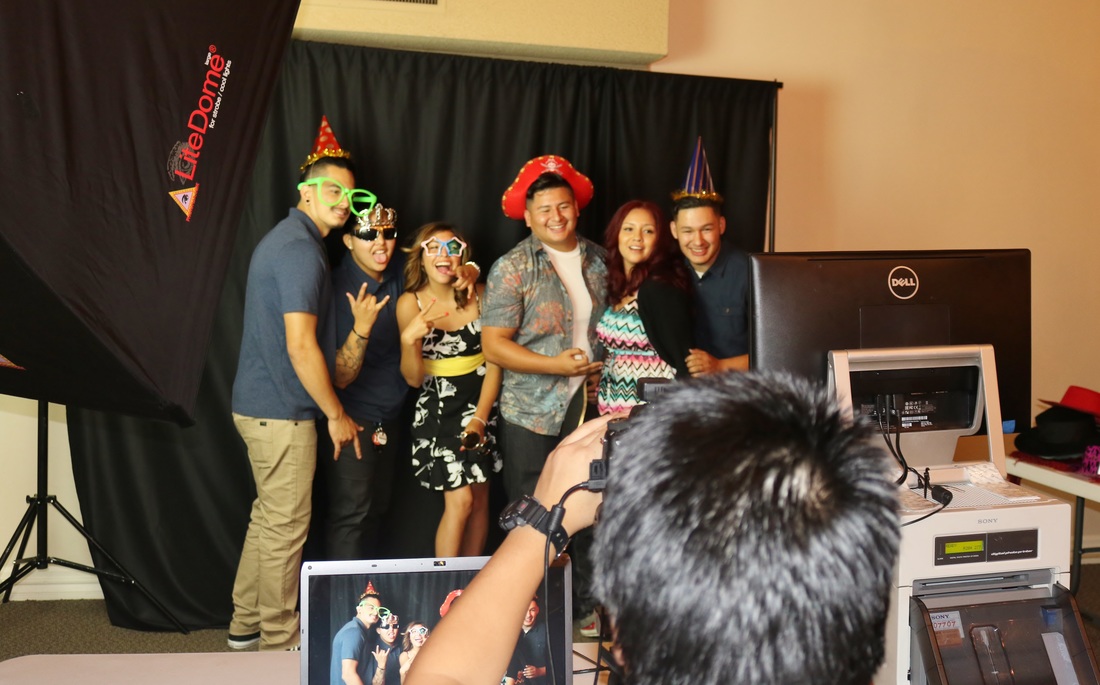 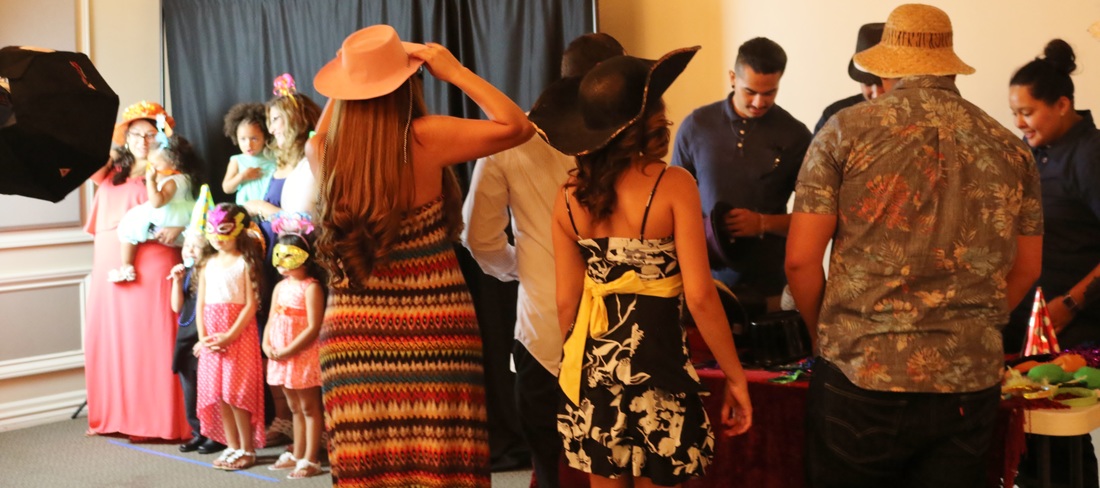 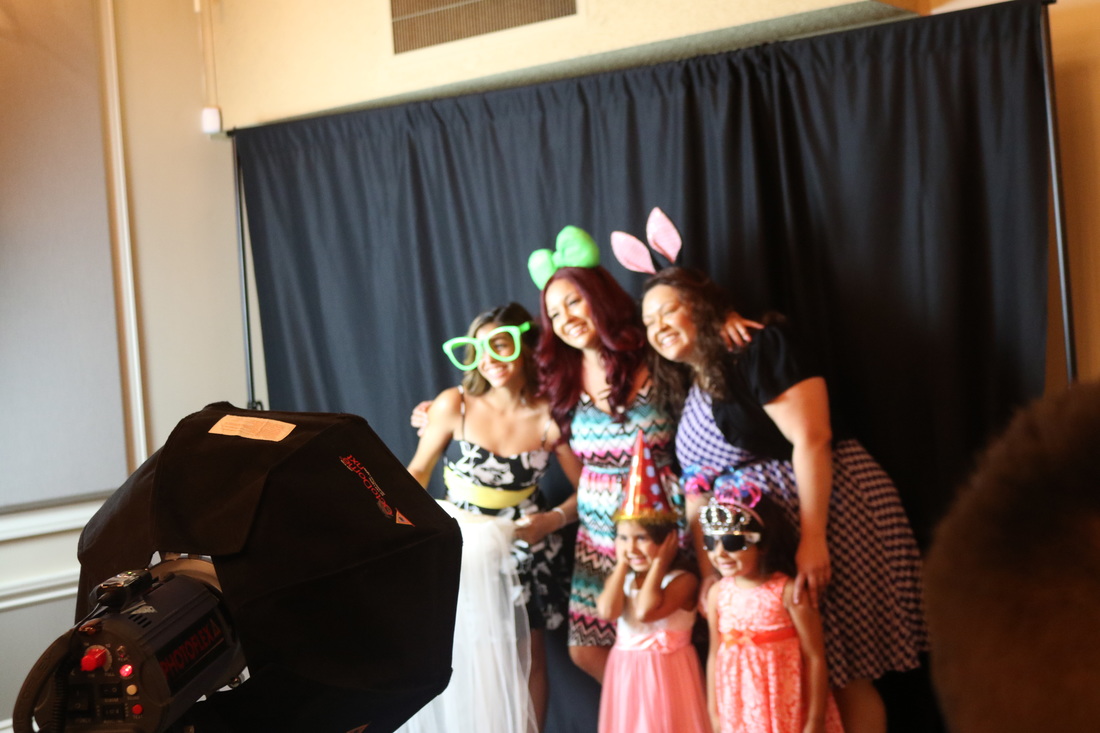 If you would like us to style your dessert buffet table at your event and set-up your photo-shoot booth, contact Angel at angel-events@comcast.net
0 Comments
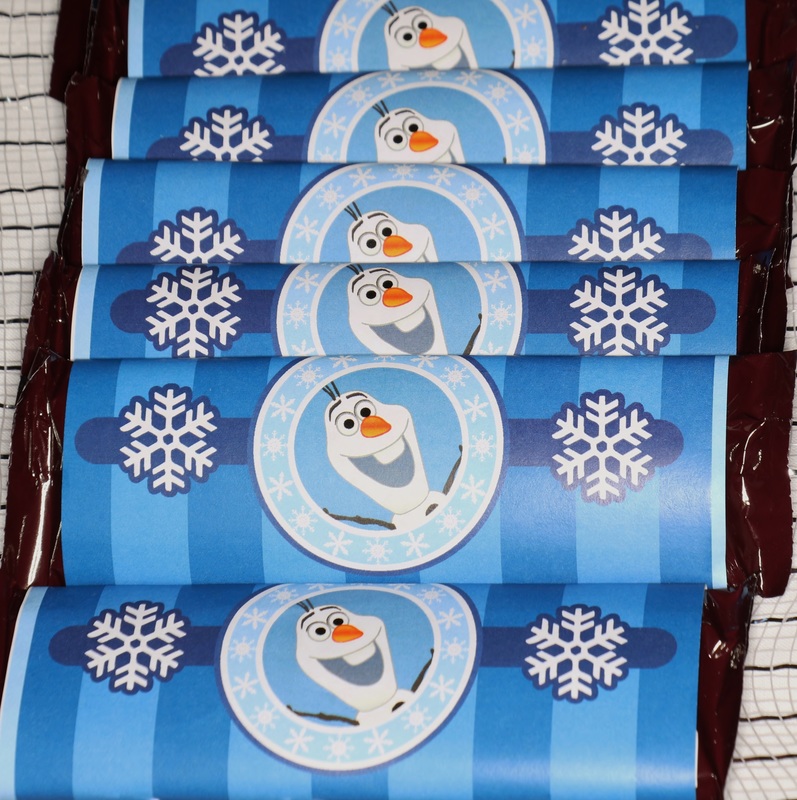
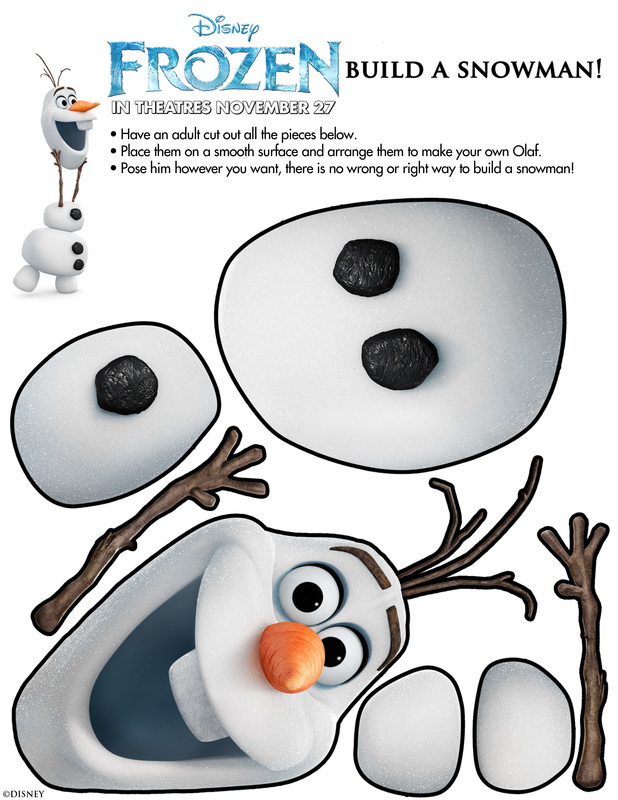
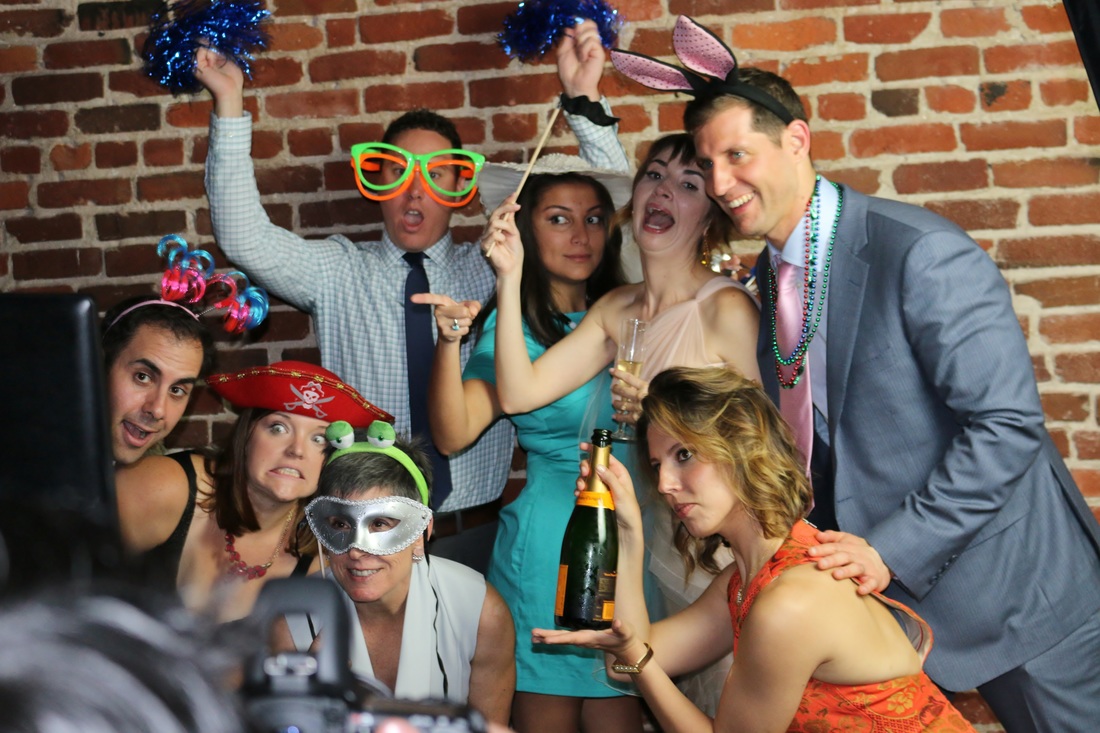
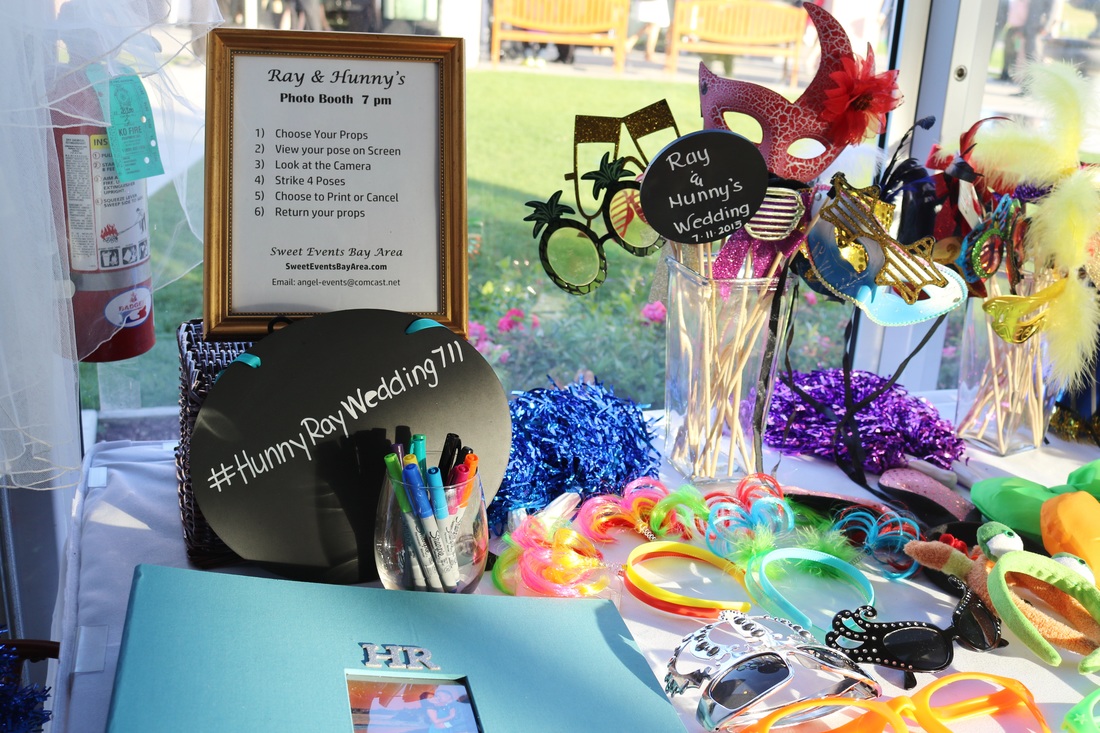 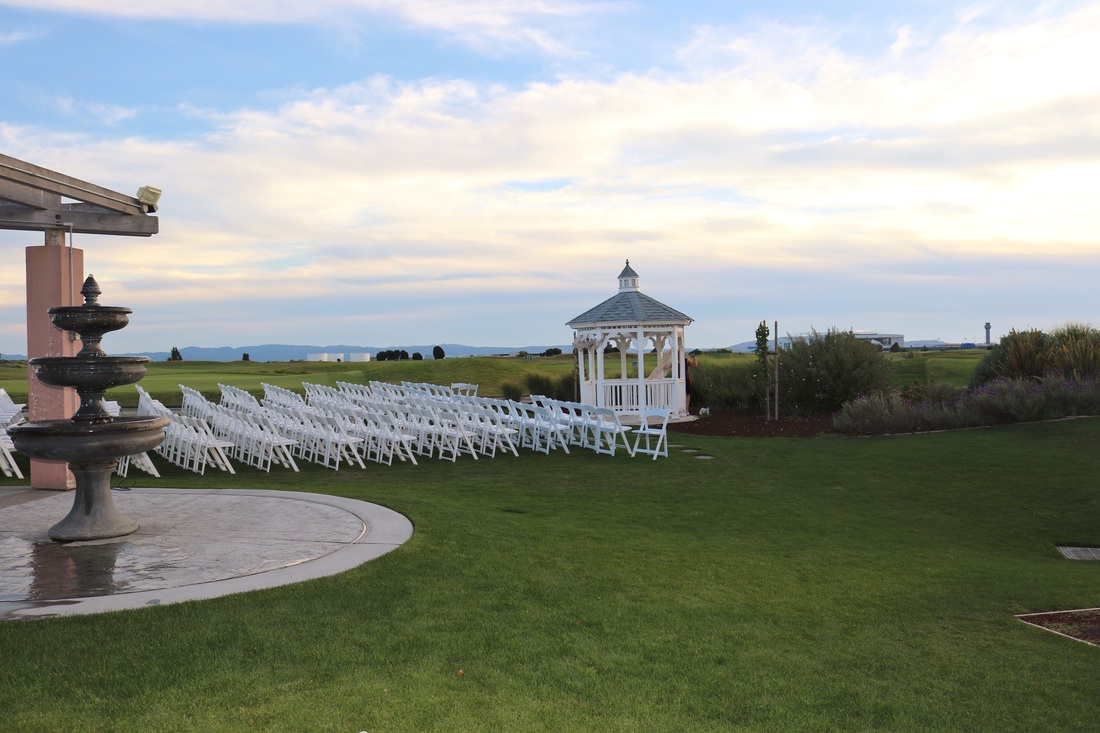 It was a beautiful wedding for Hunny and Ray at the Wedgewood Wedding and Banquet Center at the Metropolitan Golf links in Oakland last July 11th. The ceremony was held outdoors overlooking an expansive green golf course, and the Audobon Sanctuary with uninterrupted views of Oakland hills in the background. With the romantic gazebo, and splashing fountain, it was just picture perfect. After the ceremony, the guests headed indoors for the reception party. Inside, the elegantly draped ceilings, the hanging lights, silver chairs, and pops of colors was just as inviting. The photo booth was set-up by the entrance where guests could drop by as they entered the area. See some of the photos of the booth below. It was definitely a busy night! 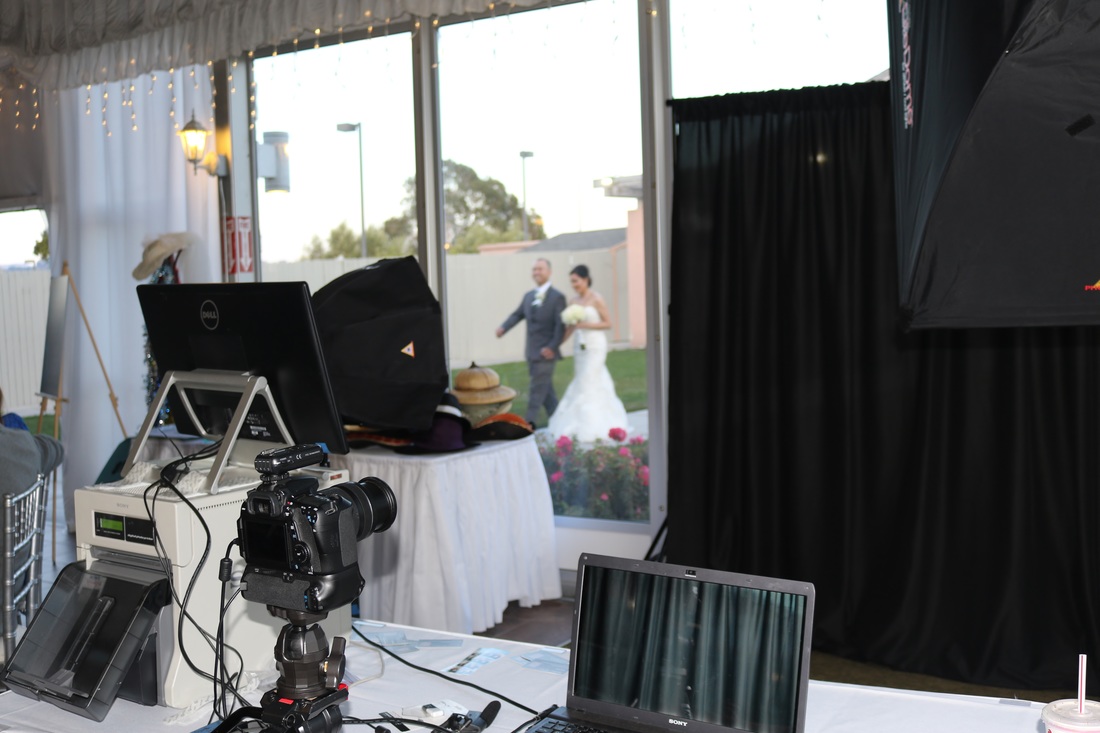   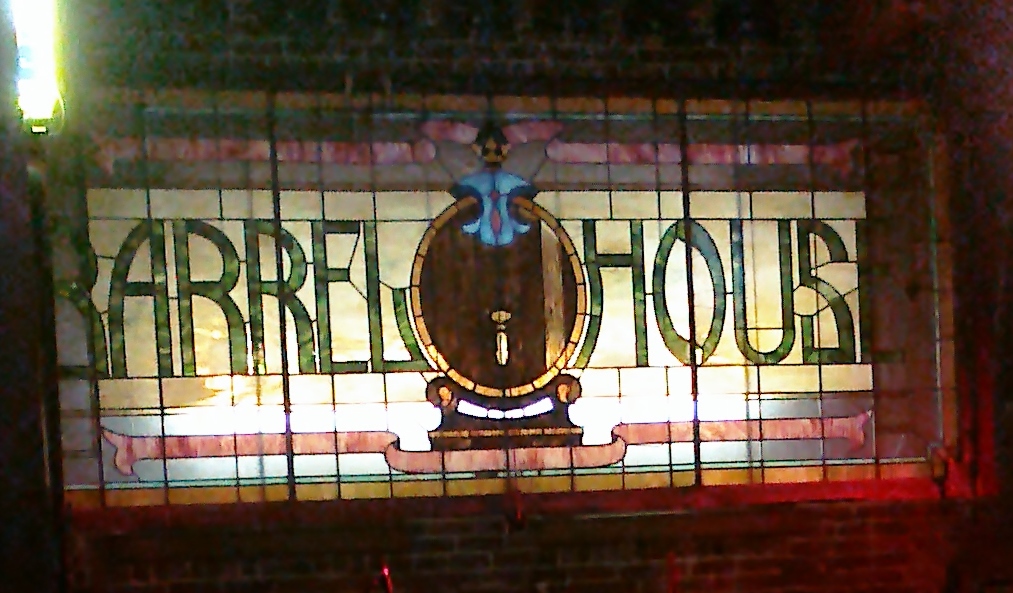 Tucked away in an alley in the midst of the busy financial district in San Francisco is an unassuming, three-level brick building called the Barrel House. Behind its huge, wooden barn doors is an amazing and cozy place with its exposed brick walls, wooden floors, and bar. After doing some research on its history, we learned that this space was built shortly after the 1906 Great Earthquake, and used to serve as a wine cask storage facility and tasting room. This was the venue where John and Robin hosted their reception party, and the photo booth last July 3rd. Robin had the right idea to use the exposed brick wall as the backdrop for the photo booth. This is where the open photo booth really outshines the enclosed photo booth-types. With our set-up, we are able to utilize the venue's unique architecture as a backdrop to their photos. Below is what Robin said about our service: My wedding guests LOVED the photo booth!! Thank you for being apart of our wedding celebration! The photos look professional and our guests had the best time wearing all the fun props and costumes. -Robin 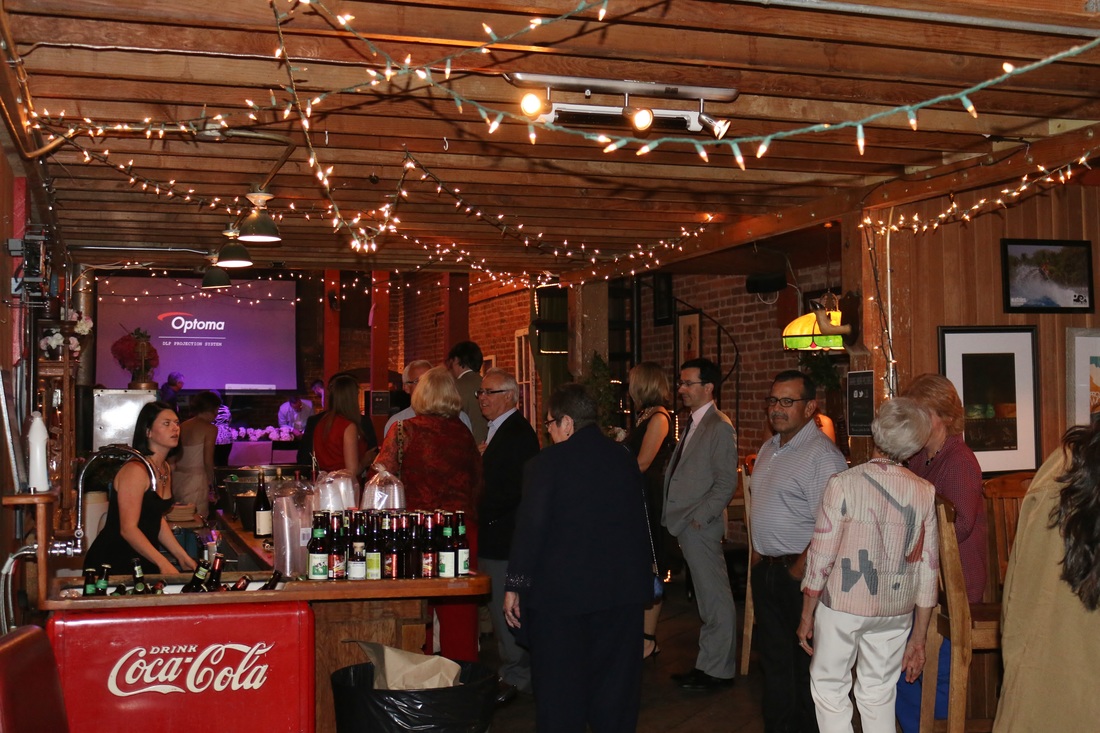 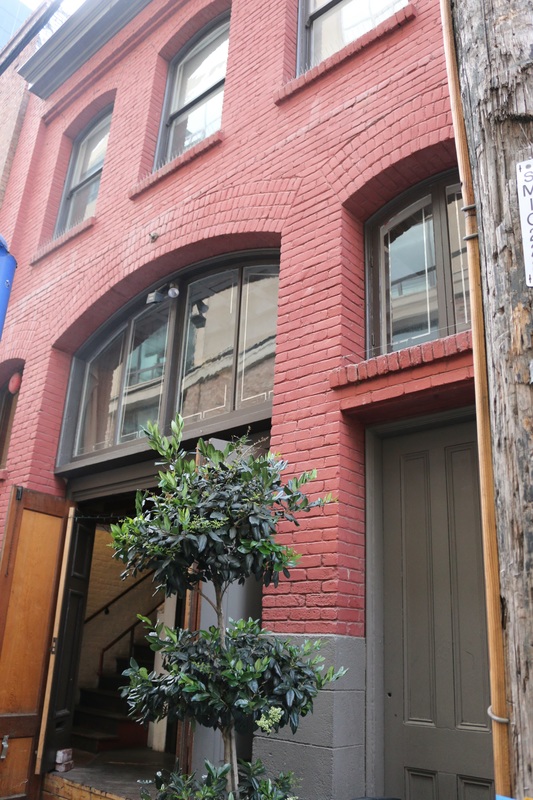 The front of the building (above), and its cozy interiors (below). Cozy interiors Below is our set-up, using the brick wall as our backdrop. The photo booth was located up these stairs on the third floor. Ideas For A Last Minute Olaf-themed Dessert Table: Instructions and Printable Labels Included!7/8/2015  2 weeks ago last Thursday at about 9:30 pm, we received an email from one of our clients requesting us to put together an Olaf-themed dessert table for her nephew who was turning 4. The party was on Saturday- in 3 days. Yikes! We immediately began the process of planning the menu, contacting the bakers, planning the serveware, the table decorations and the labels to be printed. But of course, we have access to bakers that have the ability to whip up treats quickly, and a process in place to get things done efficiently. But for others who do not have the support like we do, this post is for you. When pressed for time, its always best to think practical. Plan for desserts that will surely be ready when you need it. What use is there to prepare fancy desserts that will take hours, and don't make it to the dessert table in time? Below are some dessert treat ideas for that last minute request for an Olaf-themed dessert table: 1) Olaf the snowman- with an ingredient list of graham crackers, frosting, marshmallows, licorice, orange slices, and some chocolate melts, the only thing left to do is to assemble these-it is easy and impressive. Click on the link for instructions:www.sheknows.com/food-and-recipes/articles/1023031/olaf-the-snowman-snacks 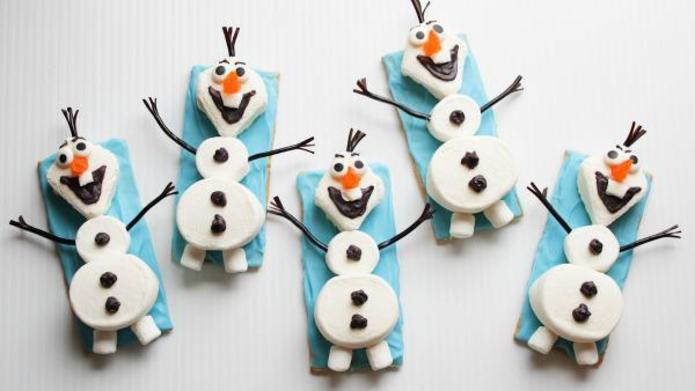 2) Rice Krispy Treats-To make these just make your standard Rice Krispy treats recipe , and cut them into squares. Then, sprinkle them with blue sprinkles for blue treats or just melt blue candy melts (to lighten the blue color, mix a few pieces of white chocolate melts into the blue chocolate melts while melting) and dunk one side to the melted chocolate, and add white sprinkles. For white treats, dunk one side on melted white chocolate, and top with either coconut or white sprinkles for snow. QUICK AND EASY . 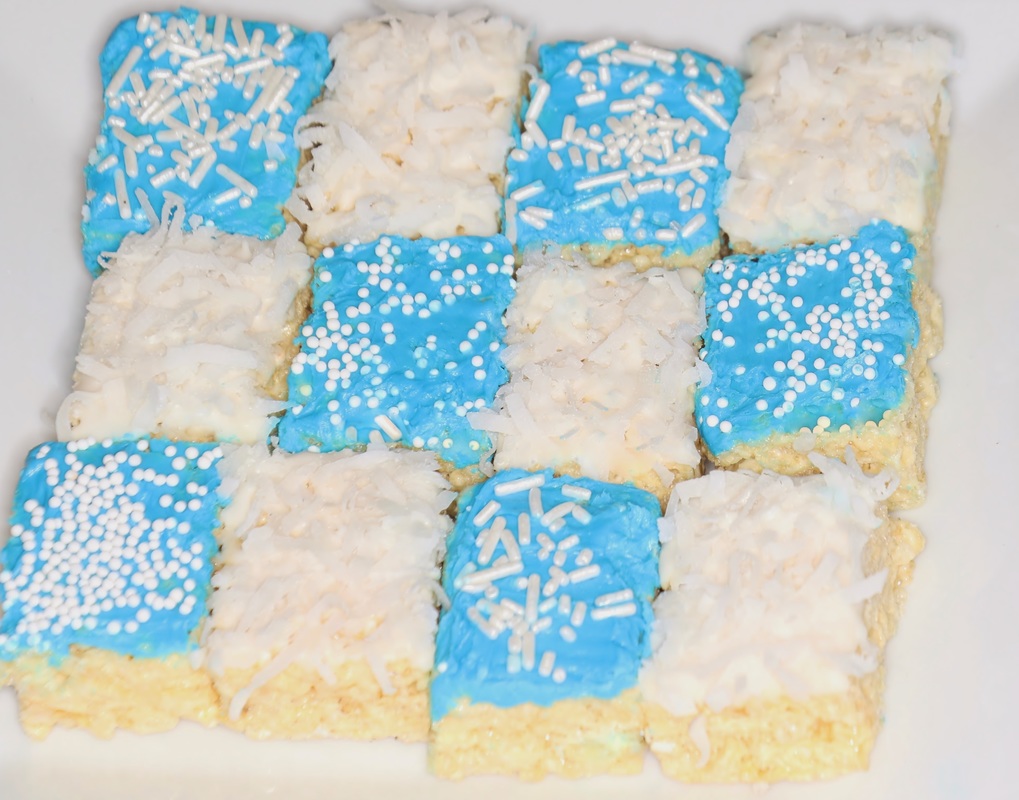 3) Marshmallow Snow Balls- For these, you will need lollipop sticks, giant marshmallows, white chocolate melts, and sprinkles or coconut flakes. You may use blue, white, or silver sprinkles. Just secure the marshmallow at the end of the stick, Dip in melted chocolate, and add the sprinkles or coconut flakes. Use a blue ribbon to decorate, if you wish. 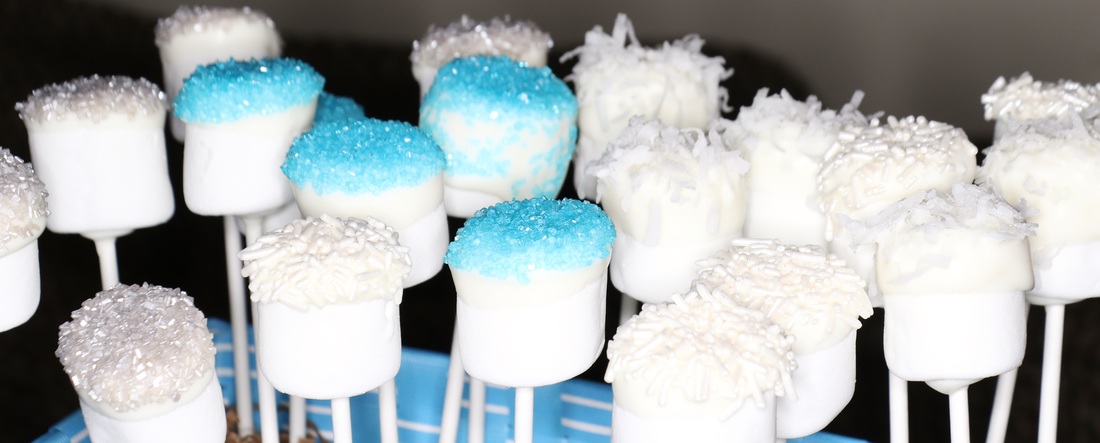 4) Olaf Chocolate Bar- This just requires purchasing your favorite regular-sized chocolate bar and then wrapping them in Olaf-designed paper which need to be printed, cut, and secured with tape. Click on the wrapper file below to download and print. This is the same wrapper seen in the photo below. wrapper source: halegrfx.com
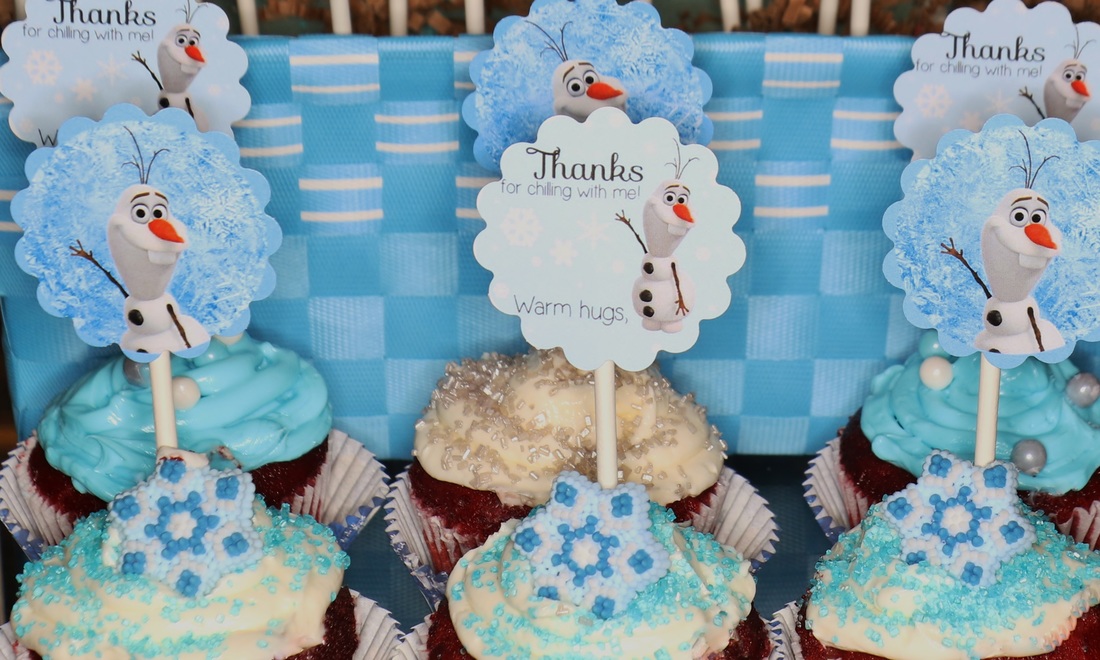
 5) Olaf-decorated cupcakes- Just bake your favorite cupcakes, decorate them with white or blue frosting, and add cupcake toppers. To make the cupcake toppers, just print the topper labels, cut them, and secure onto popsicle sticks with tape. Click on the topper labels file below to download and print. label source:thepurplepumpkinblog.co.uk
 6) Chocolate-dipped Oreos- These are Oreos dipped in melted white chocolate, and decorated with sprinkles and sugar pearls 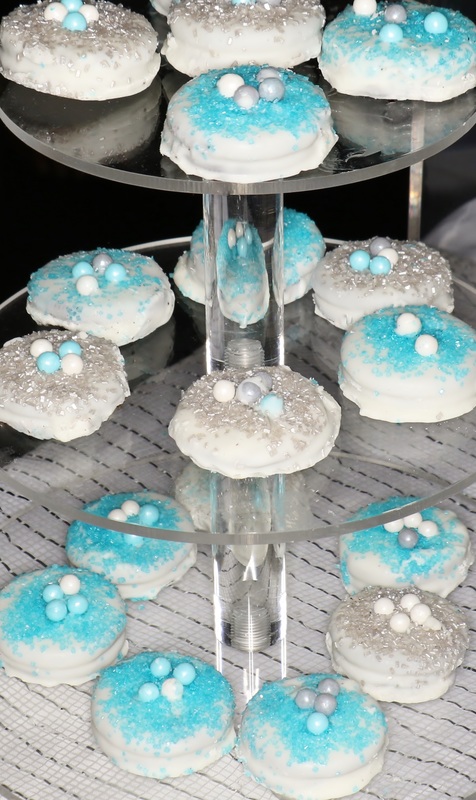 Lastly, Here is an Olaf printable that you can use for decoration. Easy to use- print out Olaf in cardstock, cut, paste and enjoy! source: Disney
 We hope that this post helps. But should you decide that you would rather pass-on the job of planning and designing the dessert table, feel free to contact us at angel-events@comcast.net.
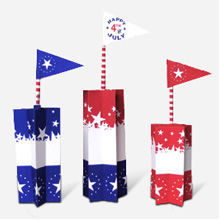
If you are curios to know the outcome of our last minute Olaf dessert table, read the letter our client sent to us: June 29, 2015 Hi Angel! I just wanted to thank you for coming through even when it was last minute. As always, you did a beautiful job. Thank you so much! -Mele 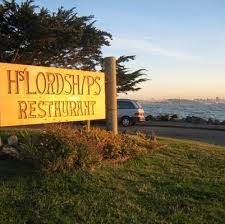 We were at HS Lordships Restaurant in Berkeley last Saturday, June 27 with the Apalitenos of Northern California for the celebration of the annual Apung Iru Festival. The Apung Iru Festival is a celebration during the last days of the month of June held in Apalit, Pampanga, a province in the Luzon Island of the Philippines. It is also the feast day of the town's Patron, St. Peter. The local term “Apung Iru” refers to the image of St. Peter. Every year, devotees in the town of Apalit hold a colorful river boat procession or Apung Iru Fluvial Parade (scroll down to see the photo). Devotees and locals celebrate the event as an offering of gratitude. It has been a part of the town's culture and tradition. For the Apalitenos of Northern California, this day was honored with dinner, dancing, live music, and the photo booth. Ryan, the president of the organization previously secured our service for 4 hours. As we approached the end of the service, he came by the booth to request for an extension of another hour, and explained that the folks enjoyed it so much that they wanted more time. How can we refuse? The last portion of the night, and for me personally the highlight of the event, was marked by the procession of guests waving flowers, wearing gold and green tops, dancing in line led by the person carrying the image of St Peter, or Apung Iru. It was truly a site to see!  Apung Iru river procession. Photo taken in the town of Apalit in the province of Pampanga, Philippines honoring the feast of the town's patron, St. Peter. Photo by: Dexter Bolasoc  The Apalitenos of Northern California celebrating the town fiesta and feast of St. Peter at HS Lordships, Berkeley 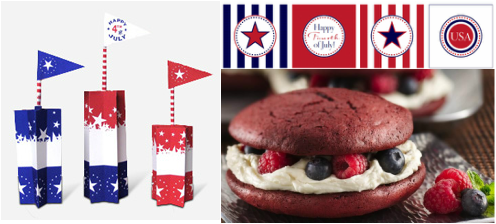 Independence Day, also known as 4th of July or July 4th is the commemoration of the adoption of the Declaration of Independence on July 4, 1776, declaring independence from Great Britain. The celebration of Independence Day has been celebrated since 1776 as the birth of American independence with typical festivities ranging from fireworks, parades and concerts to more casual family gatherings and barbecues. To make this day more special, I am sharing below a simple and easy recipe for a Red Velvet Whoopie Pie which you can add onto your menu as a dessert, as well as some free printables-cupcake toppers, cupcake wrappers, tent cards, and star and flag decorations for your table. Red Velvet Whoopie Pies (9 servings) I have included two types of filling- marshmallow and cream cheese. They are both good, you may choose whichever filling you fancy! Cookies 1 box Betty Crocker™ SuperMoist™ devil’s food cake mix ½ cup water ½ cup vegetable oil 3 eggs 2 tablespoons red food color 1 box (4-serving size) chocolate instant pudding and pie filling mix Filling Marshmallow Filling 1 cup butter or margarine, softened 2 cups marshmallow creme 1 ½ cups powdered sugar 1 teaspoon vanilla Cream Cheese Filling 1 8oz pk of cream cheese 1/3 c butter (both at room temp) 2 c powdered sugar 1 t of vanilla. Beat all ingredients until smooth Topping ½ cup fresh blueberries ½ cup fresh raspberries Directions 1 Heat oven to 350°F. Line cookie sheets with cooking parchment paper or lightly spray with cooking spray. 2 In large bowl, beat cookie ingredients with electric mixer on low speed until moistened; beat 1 minute longer on high speed. Drop batter by 1/4 cupfuls 2 inches apart onto cookie sheets. 3 Bake 13 to 16 minutes or until set (do not overbake). Cool 2 minutes; remove from cookie sheets to cooling racks. Cool completely, about 15 minutes. 4 In a large bowl, beat filling ingredients with electric mixer on high speed until light and fluffy. For each sandwich cookie pie, spread about 1/4 cup filling on bottom of 1 cooled cookie. Top with blueberries, raspberries and second cookie, bottom side down. Store covered in refrigerator. Printables 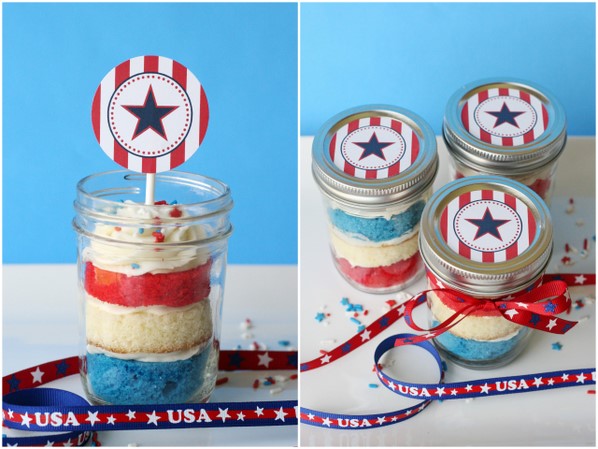  source: hgtv-tomkat studio

 source: snapfish
|
|||||||||||||||||


