SWEET EVENTS BAY AREA CANDY DESSERT BUFFET CATERING & ESPRESSO BAR CATERING
  • Home
  • Dessert Bar Photo Gallery
  • Dessert Bar Service & Pricing
  • Experiential Marketing
  • Espresso Bar Catering
  • Some Venues We Have Worked At
  • What Our Customers Say
  • Planning Guide
  • Organizations We Have Worked With
  • Blog- Latest Events & Free Printables
  • How We Are Responding to the Crisis

Sweet Events Bay Area Blog

Your source of interesting and quirky tidbits of everything candy and chocolate!

66th Birthday Celebration at Dishdash Restaurant in Sunnyvale With Our DIY-Styled Dessert Buffet

3/31/2016

0 Comments

 
Picture
Picture
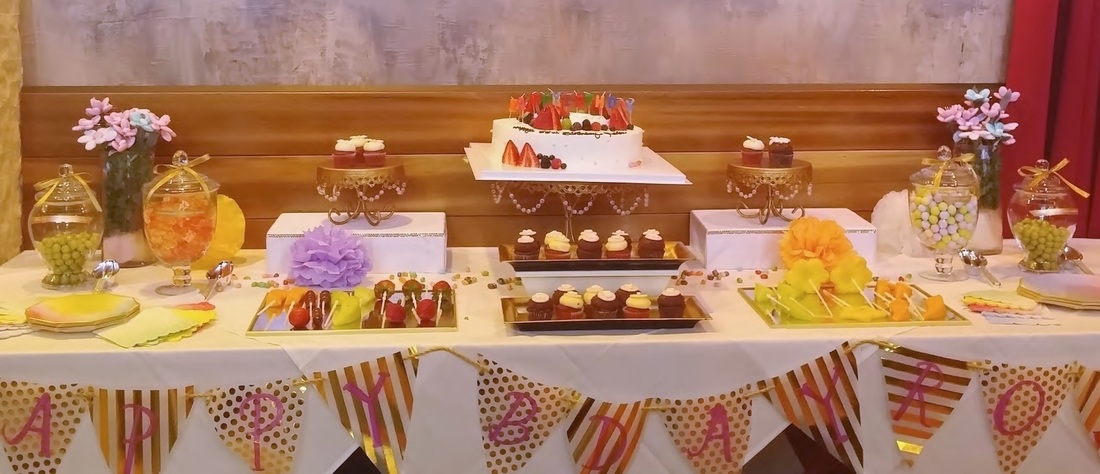
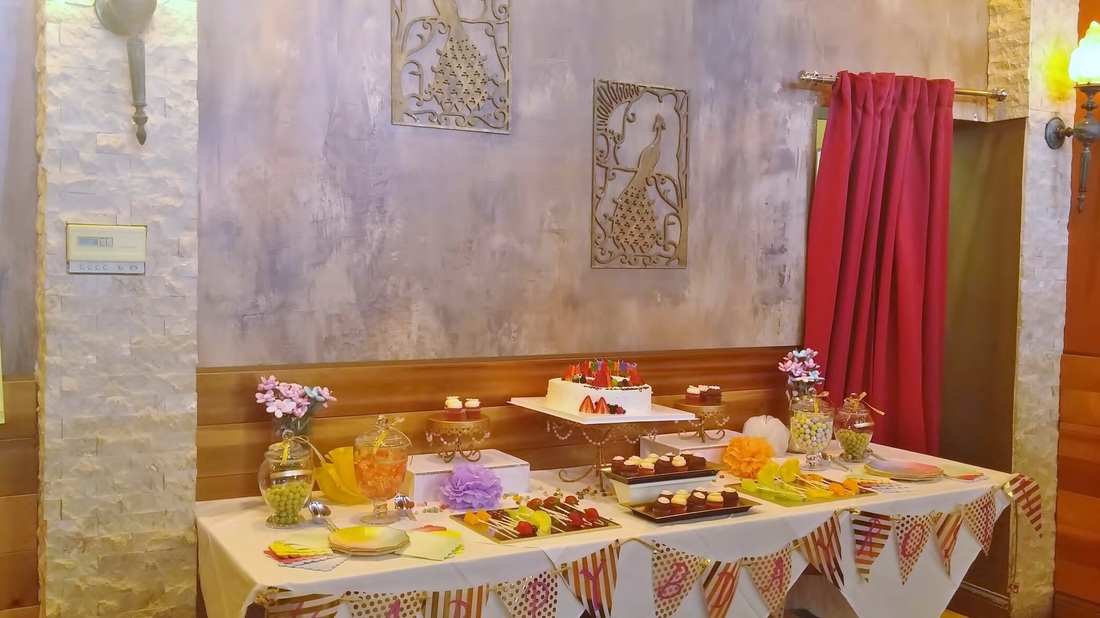
We were at Dishdash in Sunnyvale for Rosie's special 66th birthday celebration last weekend. It was Rosie's daughter and party host, Jennifer, who contacted us for the event. She opted for our Do-it-yourself-styled Dessert Table service.
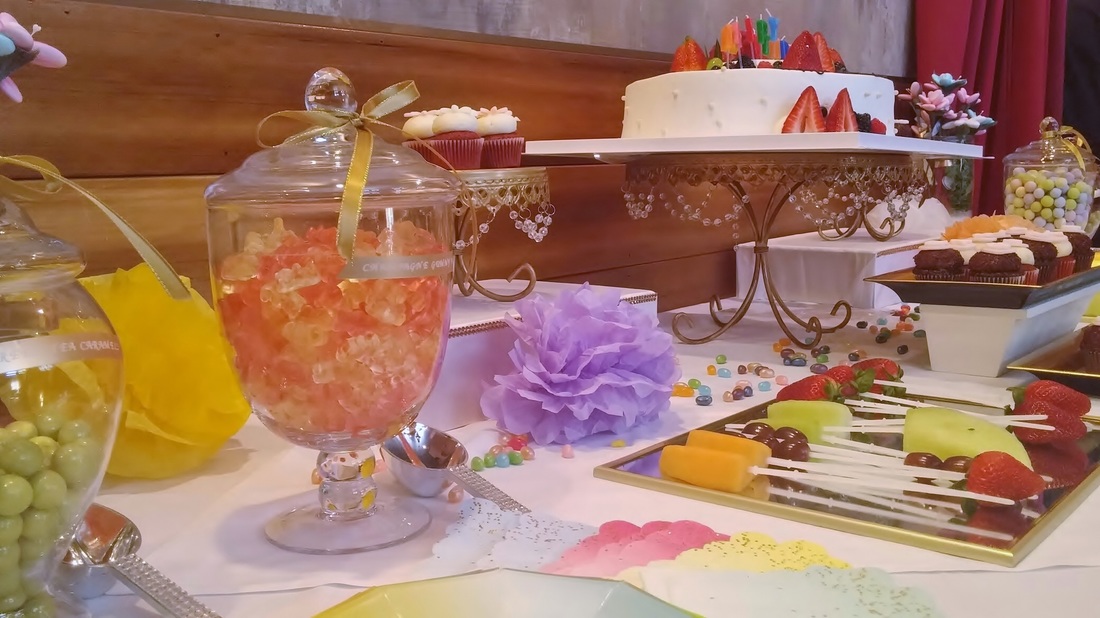
We supplied the chandelier stands, platters, glass jars, and other pieces that Jennifer needed to display her desserts nicely.

The Do-it-yourself-styled dessert table service is one of the options we offer at Sweet Events Bay Area. It is a  good choice for small group settings, or for those who wish to manage & style their own dessert table without the hassles of purchasing and storing the equipment. More importantly,
Diy-ers can be confident that their desserts will be displayed in attractive and coordinated serving pieces.  It's really simple- just let us know the dessert items on your menu, and we will deliver the serving pieces you need, as well as pick up when you're done. 


The dessert buffet was a great ending to a ten-course Mediterranean luncheon. Describing her dessert treat choices Jennifer said, "That's why my colors are so different. I had to go with tasty treats that I know people would love. Go big or go home, right?" And Jennifer is right. She chose the best treats that she could get for her mom and her guests. For decoration, Jennifer made the cute banner hanging from the table, decorated the glass jars with gold ribbons, and printed the food sticker labels.

Below is Jennifer's dessert menu:

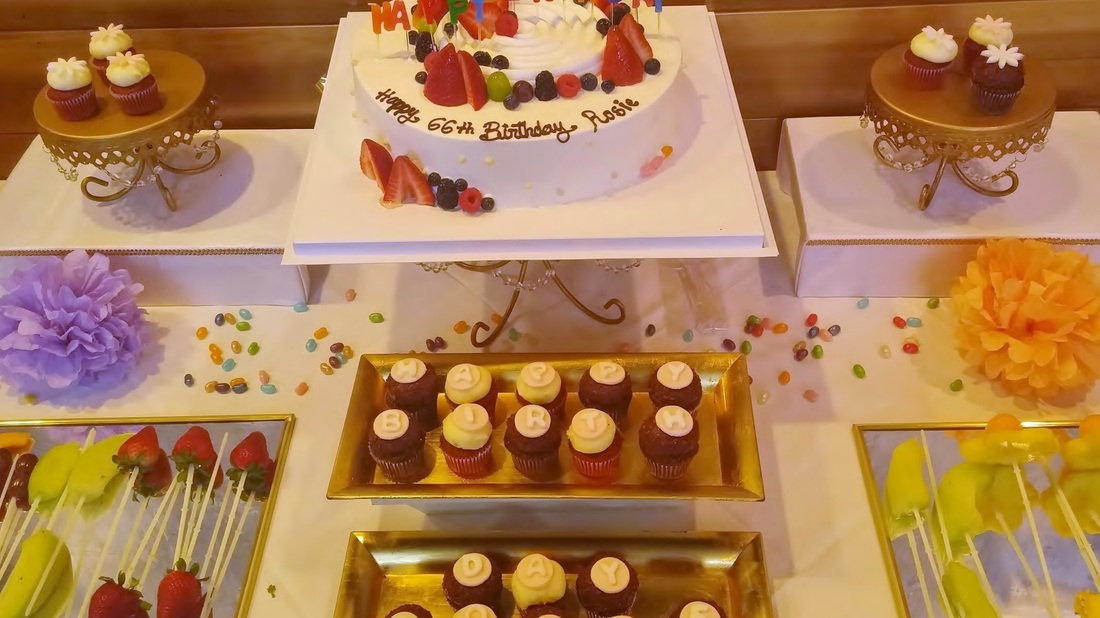
1) Paris Baguette/ Fresh Cream Birthday Cake

2) Kara's Cupcakes/ Chocolate Velvet & Red Velvet Mini Cupcakes topped with fondant 

3) Edible Arrangement/Fruits-on-a-stick 

4) Sugarfina/Match Green Tea Caramels

5) Sugarfina/Fruity Loops- Candied Cereal Bites

6) Sugarfina/Brut & Rose Champagne Bears

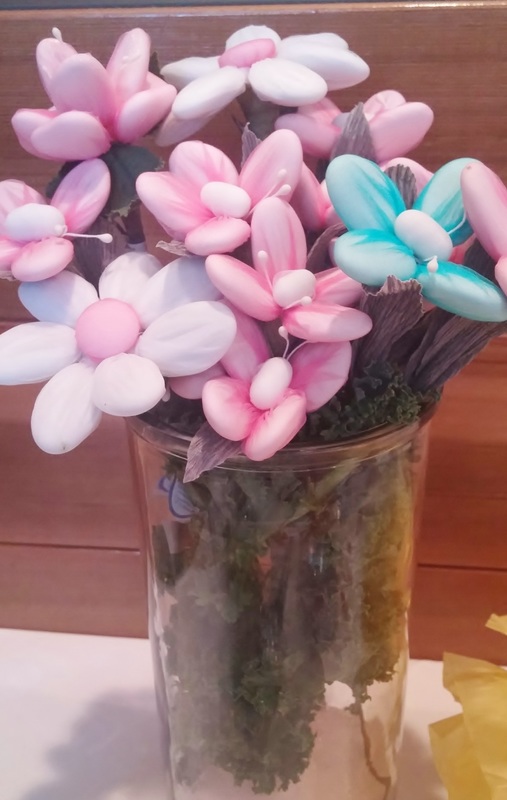
7) Chocolate flowers- handcrafted and shipped from LA  
 
 Check out the photos of Jennifer's dessert table below:
Picture
Picture
Picture
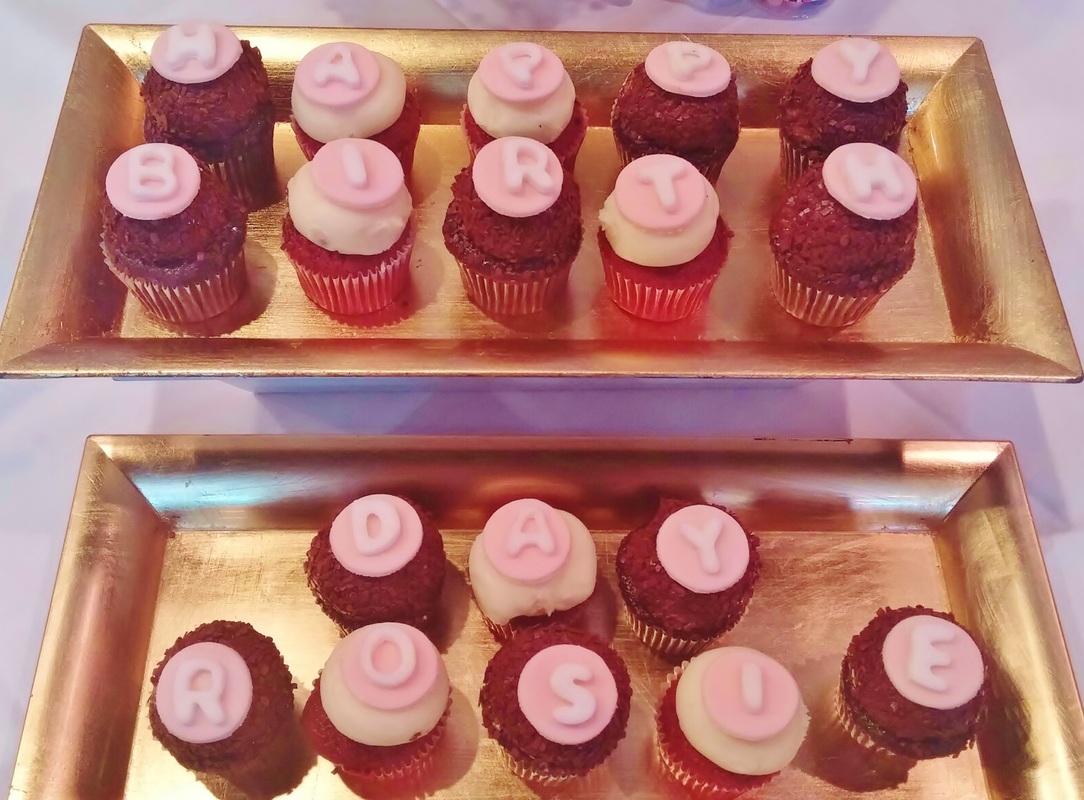
The mini cupcakes had fondant toppers that spelled "Happy Birthday Rosie"
Picture

Handcrafted chocolate flowers which were set in vases. 
Picture
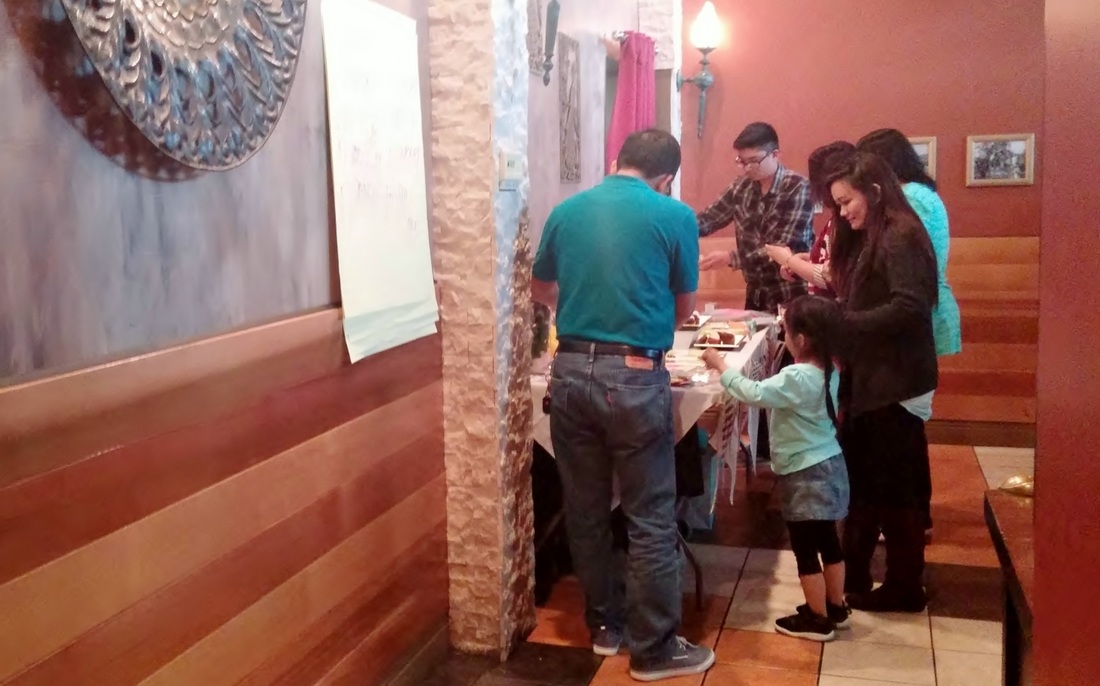
Happy guests helping themselves to the desserts
Picture
If you are thinking of setting up a Dessert Buffet Table at your next event, contact us at Sweet Events Bay Area!
0 Comments
Easy Spring Recipes: Pie Pops, Chocolate Pie Churros, Mini Pie Cups With Marie Callender's Cream Pie As Ingredient

3/25/2016

0 Comments

 
Picture
Picture
Picture
Photos Courtesy of Forkful.com

With the blooming of flowers, the budding of leaves, and longer daylight hours, Spring has indeed sprung! 

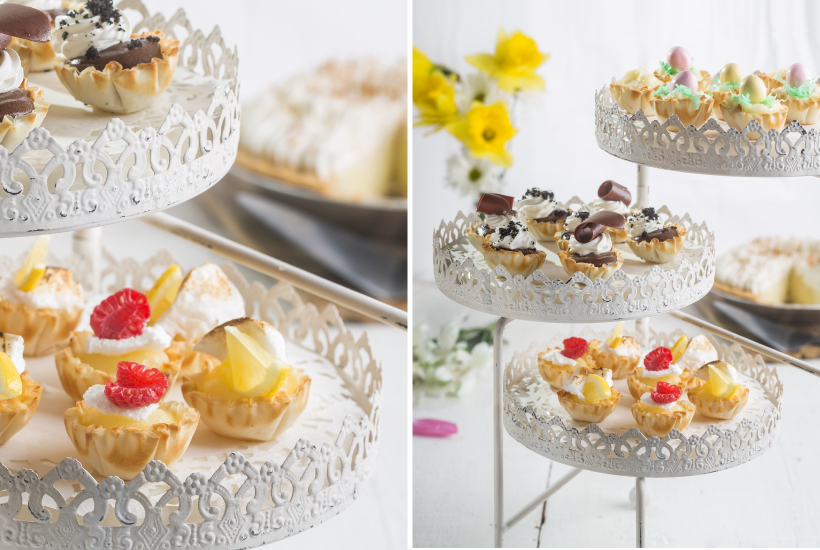
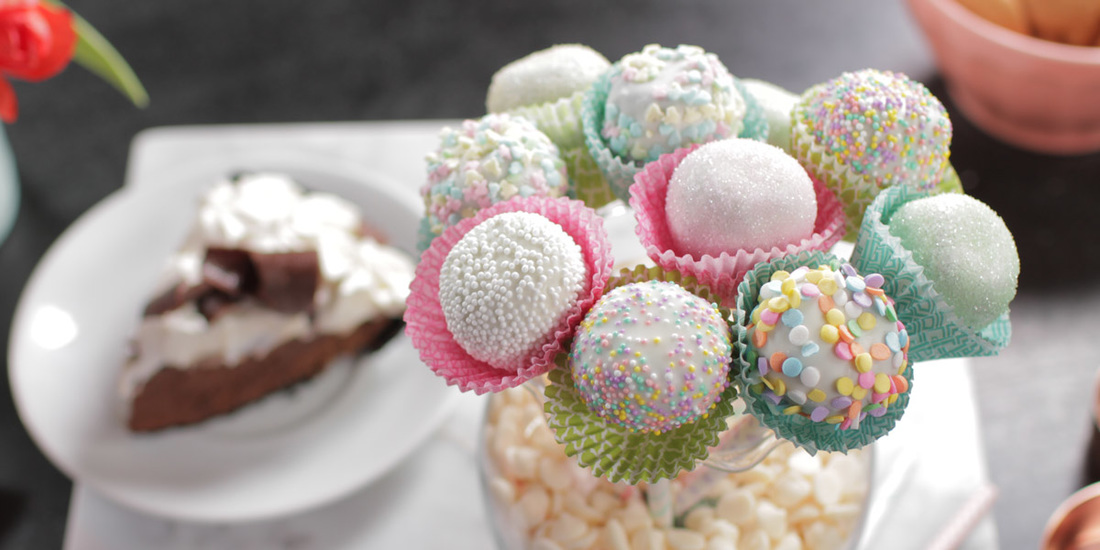
Create the sweetest Spring memories with one of the nation's favorites... Pie! From Forkful.com, check out these easy recipes featuring Marie Callender's Chocolate Satin Cream Pie. If chocolate is not for you , you may also replace this with any of your preferred cream pie flavors like Banana, Key lime, Lemon Meringue or Coconut to create these hard-to-forget spring treats. You can find these at your local Target or Walmart stores. Just a few slices of the pie is all that the recipe needs, and, then you can enjoy the rest of the pie too! 

Scroll down for Spring Pie Pops, Chocolate Pie Churros, and Mini Pie Cups recipes.

(Disclaimer: I am not paid to endorse Marie Callender's products) 
Picture
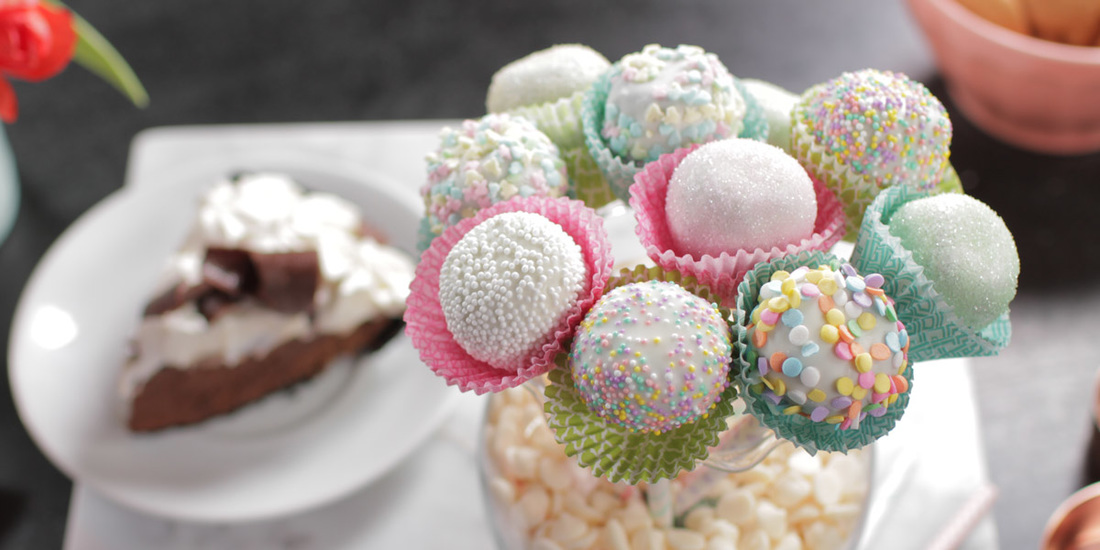
​                                         Pie Pops

​Ingredients: 
  • 50 Vanilla wafers
  • 2 slices (1/8th each) Marie Callender's Chocolate Satin Pie
  • 1 cup White morsels
  • 1 TBS Wesson Vegetable Oil
  • 12 Cake pop sticks
  • Assorted sprinkles, colored sugar or crushed pretzels
  • Raspberries

Directions:
  1. Line shallow baking pan with parchment paper; set aside. Place wafers in food processor bowl; pulse wafers into fine crumbs. Add pie slices; pulse until mixture comes together and forms a ball.
  2. Roll mixture into slightly larger than 1-inch balls; place on pan. Insert sticks. Freeze 30 minutes or until set.
  3. Place morsels and oil in small microwave safe bowl. Microwave on HIGH 30 seconds; stir. Microwave on HIGH 30 seconds more or until softened; stir until mixture is melted completely. Roll a pie ball in melted mixture until evenly coated, spooning extra over top to cover completely. Let excess drip off and place on pan. Immediately sprinkle each pie pop with colored sugar, sprinkles or crushed pretzels, if desired. Refrigerate 1 hour or until firm. Store in airtight container in refrigerator.
Picture

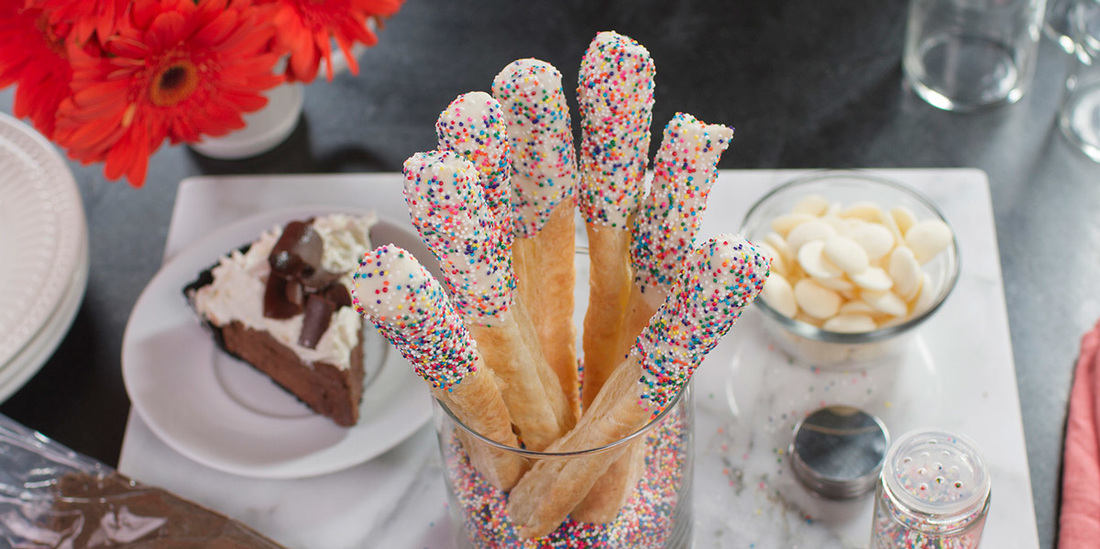
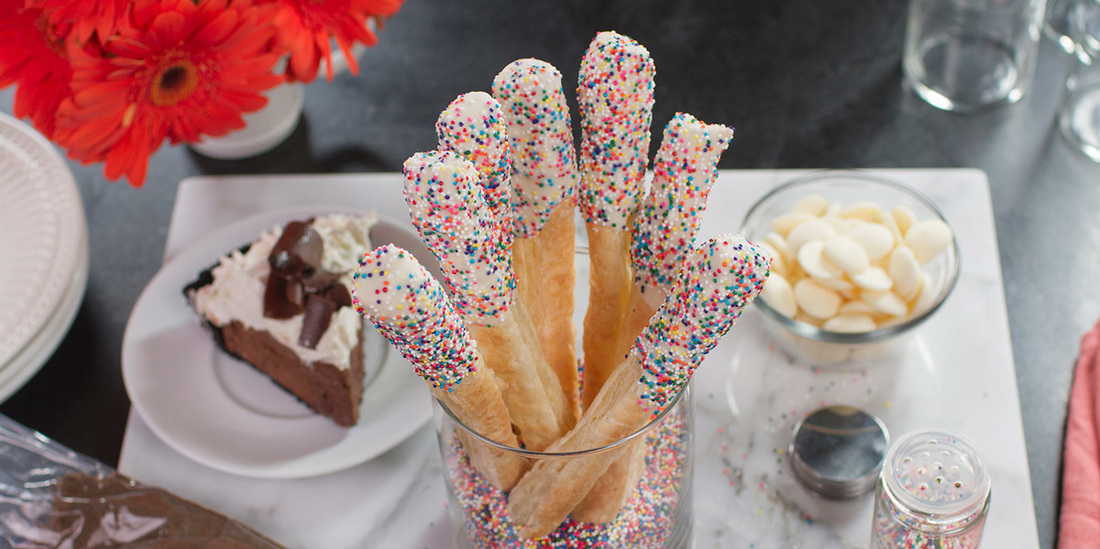
​                                   Chocolate Pie Churros

Ingredients:
  • PAM® Baking Spray
  • 1 (17.3-oz.) package frozen puff pastry sheets, thawed
  • 1/4 cup granulated sugar
  • 1 teaspoon ground cinnamon
  • 1 pkg (28 oz each) Marie Callender's Chocolate Satin Pie (thawed according to package directions)
  • 1/4 cup butter, melted
  • 1 cookie sheet
  • Parchment paper
  • Pastry bag/pastry tip
  • Skewer (or toothpick)
  • Small bowl

Directions:
  1. Preheat oven to 450°F. Line baking sheet with parchment paper; spray with baking spray. Unfold and cut puff pastry sheets in half lengthwise, and cut each half crosswise into 1-inch strips. Place strips on baking sheet. Bake 10 minutes or until golden brown.
  2. Meanwhile, combine sugar and cinnamon. Remove pastry strips from oven; brush with butter and roll in cinnamon-sugar mixture. Let stand on a wire rack 5 minutes or until cooled completely.
  3. In a small bowl blend 3 pieces of Marie Callender’s® Chocolate Satin Pie until smooth (crust and filling).
  4. Using a skewer, carve a hole from end to end through the center of each churro.
  5. Fill pastry bag with pastry tip; add pie mixture. Snip corner of bag, to create a homemade piping bag. Pipe filling mixture into each end of churro.

Spring Decorating Idea
Dip the end of each churro in white chocolate and sprinkles. Serve in a clear vase with sprinkles at bottom.
​
Picture
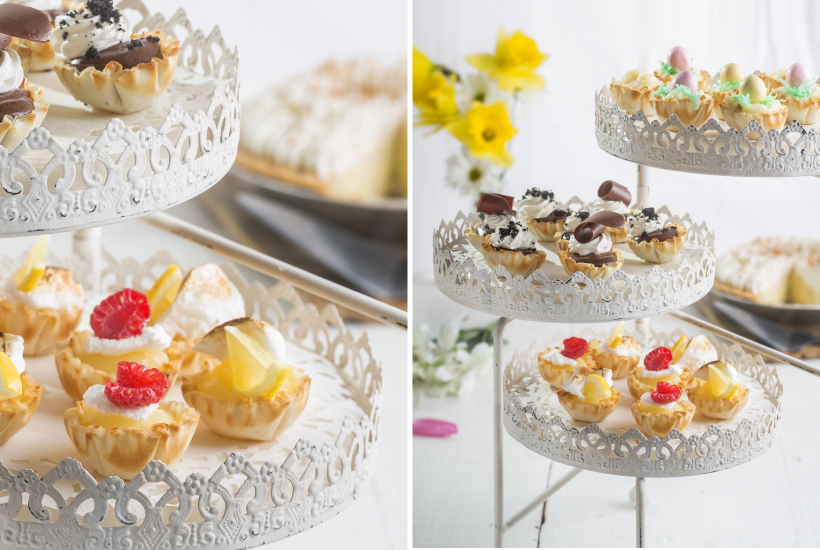
                                              Mini Pie Cups

Ingredients:
  • 1 pkg (1.9 oz each) mini fillo shells
  • 2 slices (1/8th each) Marie Callender's Cream Pies (coconut, lemon meringue, or chocolate satin)
  • Fresh berries, colored coconut, chocolate candies, banana slices

Directions:
  1. Preheat oven to 350F. Place fillo shells on shallow baking pan. Bake 3 to 5 minutes or until crisp. Cool completely before filling pie cups.
  2. Place 2 teaspoons pie filling in each fillo shell; top mini pie cups with assorted candies, coconut or fruit, if desired. Serve immediately.
0 Comments

Recipe Round-up for St. Patrick's Day!

3/13/2016

0 Comments

 
We are a few days away from St. Patrick's Day which will be celebrated on March 17. We have rounded up easy treat recipes that will definitely add to the fun on this festive day for both adults and kids! Scroll down for recipes of Shamrock Rice Krispie Treats, Leprechaun hats, Shamrock Pretzel Treats and Pistachio and Chocolate Leprechaun Cookies. Happy St. Paddy's Day!

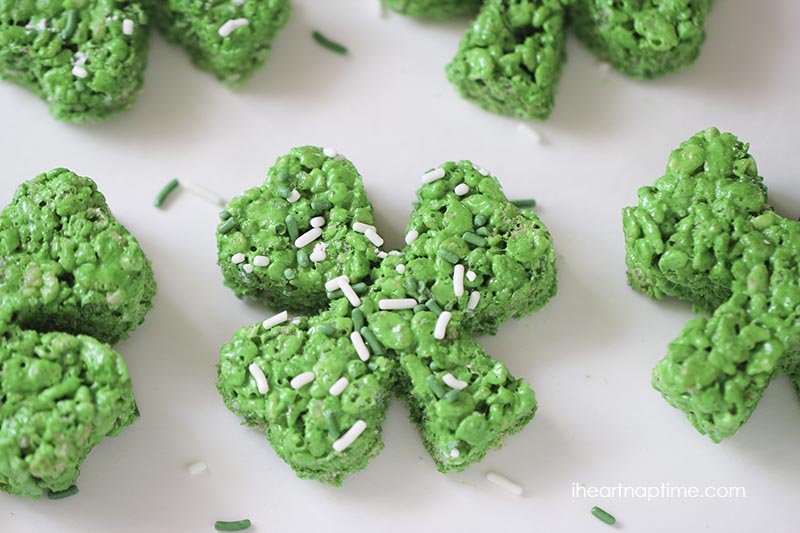
Shamrock Rice Krispie Treats
from Iheartnaptime.net

Picture
Photo courtesy of iheartnaptime.net

Ingredients:
  • 1/4 cup butter
  • 4 cups mini marshmallows (make sure they're soft)
  • 5 cups rice krispies
  • Green food coloring
  • Sprinkles (optional)
Directions:1. Melt butter over low heat in a large sauce pan. Once butter is melted add in marshmallows and continue to stir until the marshmallows have melted.
2. Add in food coloring and stir until combined.
3. Remove from heat and stir in rice krispies. Stir until the cereal is coated.
4. Place rice krispie treats in a buttered 9x13 pan. Press down on the treats with a buttered spatula.
5. For the shamrocks, place a little bit of butter around the edges of the cookie cutter, then push down on the rice krispies.
6. Place shamrocks on wax paper. Enjoy!

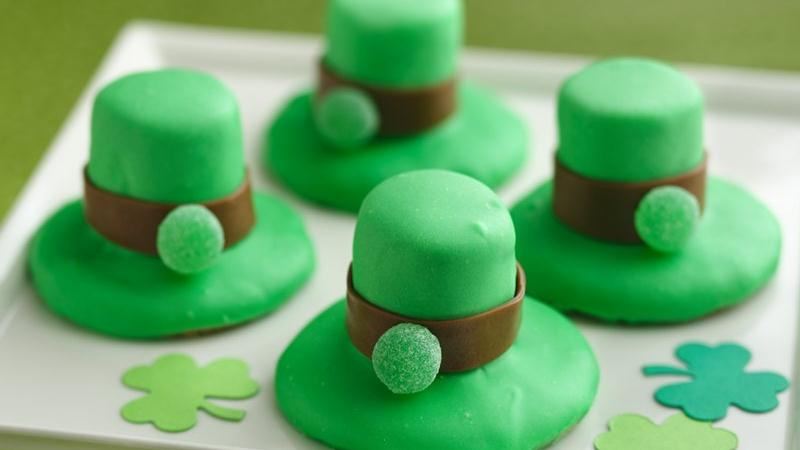
Leprechaun Hats
from bettycrocker.com

Picture
Photo courtesy of bettycrocker.com

Ingredients
1 pouch Betty Crocker™ sugar cookie mix
1/2 cup butter or margarine, softened
1 egg
1 container (1 lb) Betty Crocker™ Rich & Creamy vanilla frosting
1/4 teaspoon Betty Crocker™ green gel food color
24 large marshmallows
24 small (1-inch) chewy chocolate candies
12 small green gumdrops

Directions
  • 1 Heat oven to 375°F. In medium bowl, stir cookie mix, butter and egg until soft dough forms. Roll dough in 24 (1-inch) balls. On ungreased cookie sheets, place 2 inches apart.
  • 2 Bake 10 to 12 minutes or until edges are light golden brown. Immediately place marshmallow on each cookie. Remove from cookie sheets to cooling racks. Cool completely, about 15 minutes.
  • 3 In microwavable bowl, microwave frosting on High 30 seconds. Stir; frosting should be a thick spoonable glaze. Stir food color into frosting, adding more if needed to achieve desired color. Spoon warm frosting over each cookie, coating completely and allowing excess to drip off. Let stand 20 minutes to set.
  • 4 Roll chocolate candies into ropes. Flatten with rolling pin into 1/8-inch-thick ribbons. Cut into strips with scissors to resemble hat bands; arrange around base of marshmallow on each cookie. Cut gumdrops crosswise in half (reshaping as needed). Press cut side onto hat band. Lift cookies onto serving platter with pancake turner, leaving excess frosting behind. Store in airtight container.

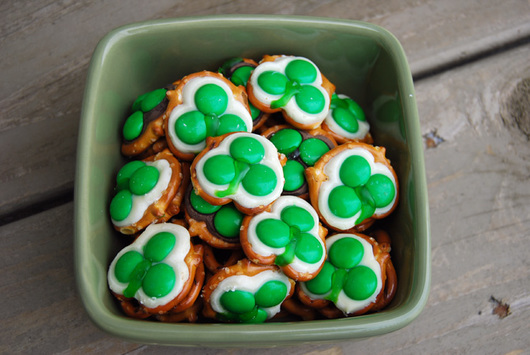
Shamrock Pretzel Treats
​

Picture
Photo courtesy of stickyegg.com

​Ingredients
1 bag mini twist pretzels
1 bag Hershey Kisses or Wilton Bright White Candy Melts 
Green M&M's
Green Tube Icing

Instructions
  1. Preheat oven to 200 degrees F.
  2. Line a cookie sheet with aluminum foil or parchment paper.
  3. Place the pretzels in a single layer on the baking sheet. Place an unwrapped Hershey's candy or Wilton candy melt on top of each pretzel. Put the cookie sheet in the oven for about 7 minutes, until the chocolate starts to get soft. 
  4. Remove the cookie sheet from the oven and immediately place 3 pcs. of M & M candies on each pretzel, gently pressing down to help spread the melted chocolate out across the entire pretzel.
  5. Place cookie sheet in the fridge so that the bites can set up quickly. 
  6. When cool, use icing tip on a tube of green frosting to draw on the stems of the shamrocks.

Note: You don't want the chocolate to be completely melted, but just soft enough so that you can press a candy into it. You may have to adjust the time in the oven if 7 min. is not enough.

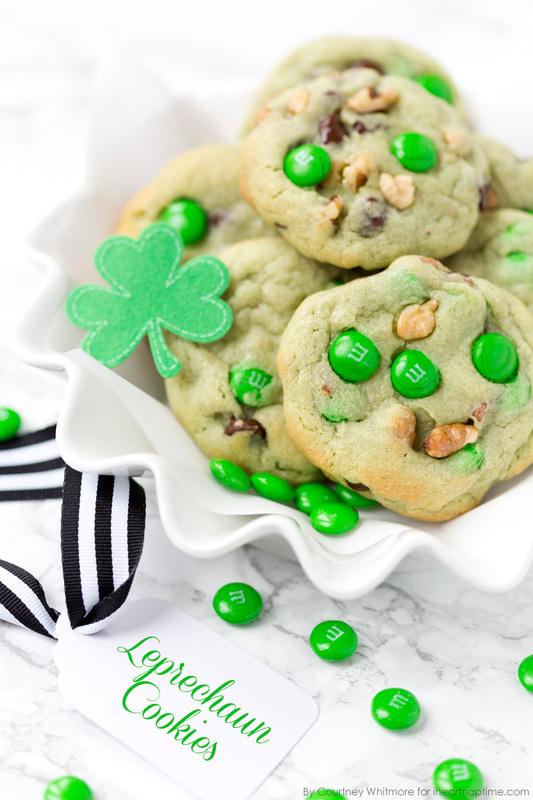
Pistachio and Chocolate Leprechaun Cookies
from iheartnaptime.net

Picture
Photo courtesy of iheartnaptime.net

Yield: 1 DOZEN, DEPENDING ON SIZE
Ingredients:
1 cup butter, softened
1/2 cup granulated sugar
1/2 cup light brown sugar
1 teaspoon vanilla extract
1/2 teaspoon almond extract
1 (3.4 ounce) package instant pistachio pudding (dry mix)
2 eggs
2 1/4 cups cups all-purpose flour
1 teaspoon baking soda
1/4 teaspoon salt
1/2 cup dark chocolate chips
1/2 cup green M&Ms
1/2 cup chopped walnuts
green food coloring *optional
Directions:Preheat oven to 375 degrees F. In an electric mixer with paddle attachment, cream together butter and sugars. Add extracts and pudding mix and eggs one at a time. Beat for 1 minute.
In a separate bowl, combine flour, baking soda, and salt. Add to sugar mixture one a little at a time, mixing thoroughly between each addition. Add a drop or two of green food coloring at this point if you want a stronger green color. Stir in chocolate chips, green M&Ms, chopped walnuts, and any other mix-ins you like!
Bake for 8-10 minutes or until edges are turning slightly golden. Let cool and enjoy!
0 Comments

    Categories

    All

    Archives

    May 2021
    March 2021
    October 2020
    September 2020
    February 2020
    January 2020
    December 2019
    November 2019
    August 2019
    July 2019
    June 2019
    May 2019
    March 2019
    February 2019
    January 2019
    December 2018
    October 2018
    June 2018
    May 2018
    February 2018
    January 2018
    November 2017
    October 2017
    August 2017
    June 2017
    May 2017
    April 2017
    February 2017
    January 2017
    December 2016
    November 2016
    September 2016
    July 2016
    May 2016
    March 2016
    February 2016
    January 2016
    December 2015
    November 2015
    October 2015
    September 2015
    August 2015
    July 2015
    June 2015
    May 2015
    April 2015
    March 2015
    February 2015
    January 2015
    December 2014
    November 2014
    October 2014
    September 2014
    August 2014

    Follow Us:
Visit The Knot
  • Home
  • Dessert Bar Photo Gallery
  • Dessert Bar Service & Pricing
  • Experiential Marketing
  • Espresso Bar Catering
  • Some Venues We Have Worked At
  • What Our Customers Say
  • Planning Guide
  • Organizations We Have Worked With
  • Blog- Latest Events & Free Printables
  • How We Are Responding to the Crisis